Brief
Develop a series of three stitched pieces showing: a sense of repetition, variety of scale and a placement design.
| Piece #1
|
Piece #2
|
Piece #3
|


Choosing Imagery
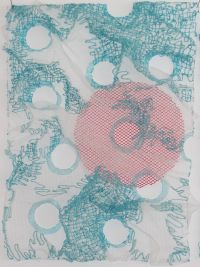
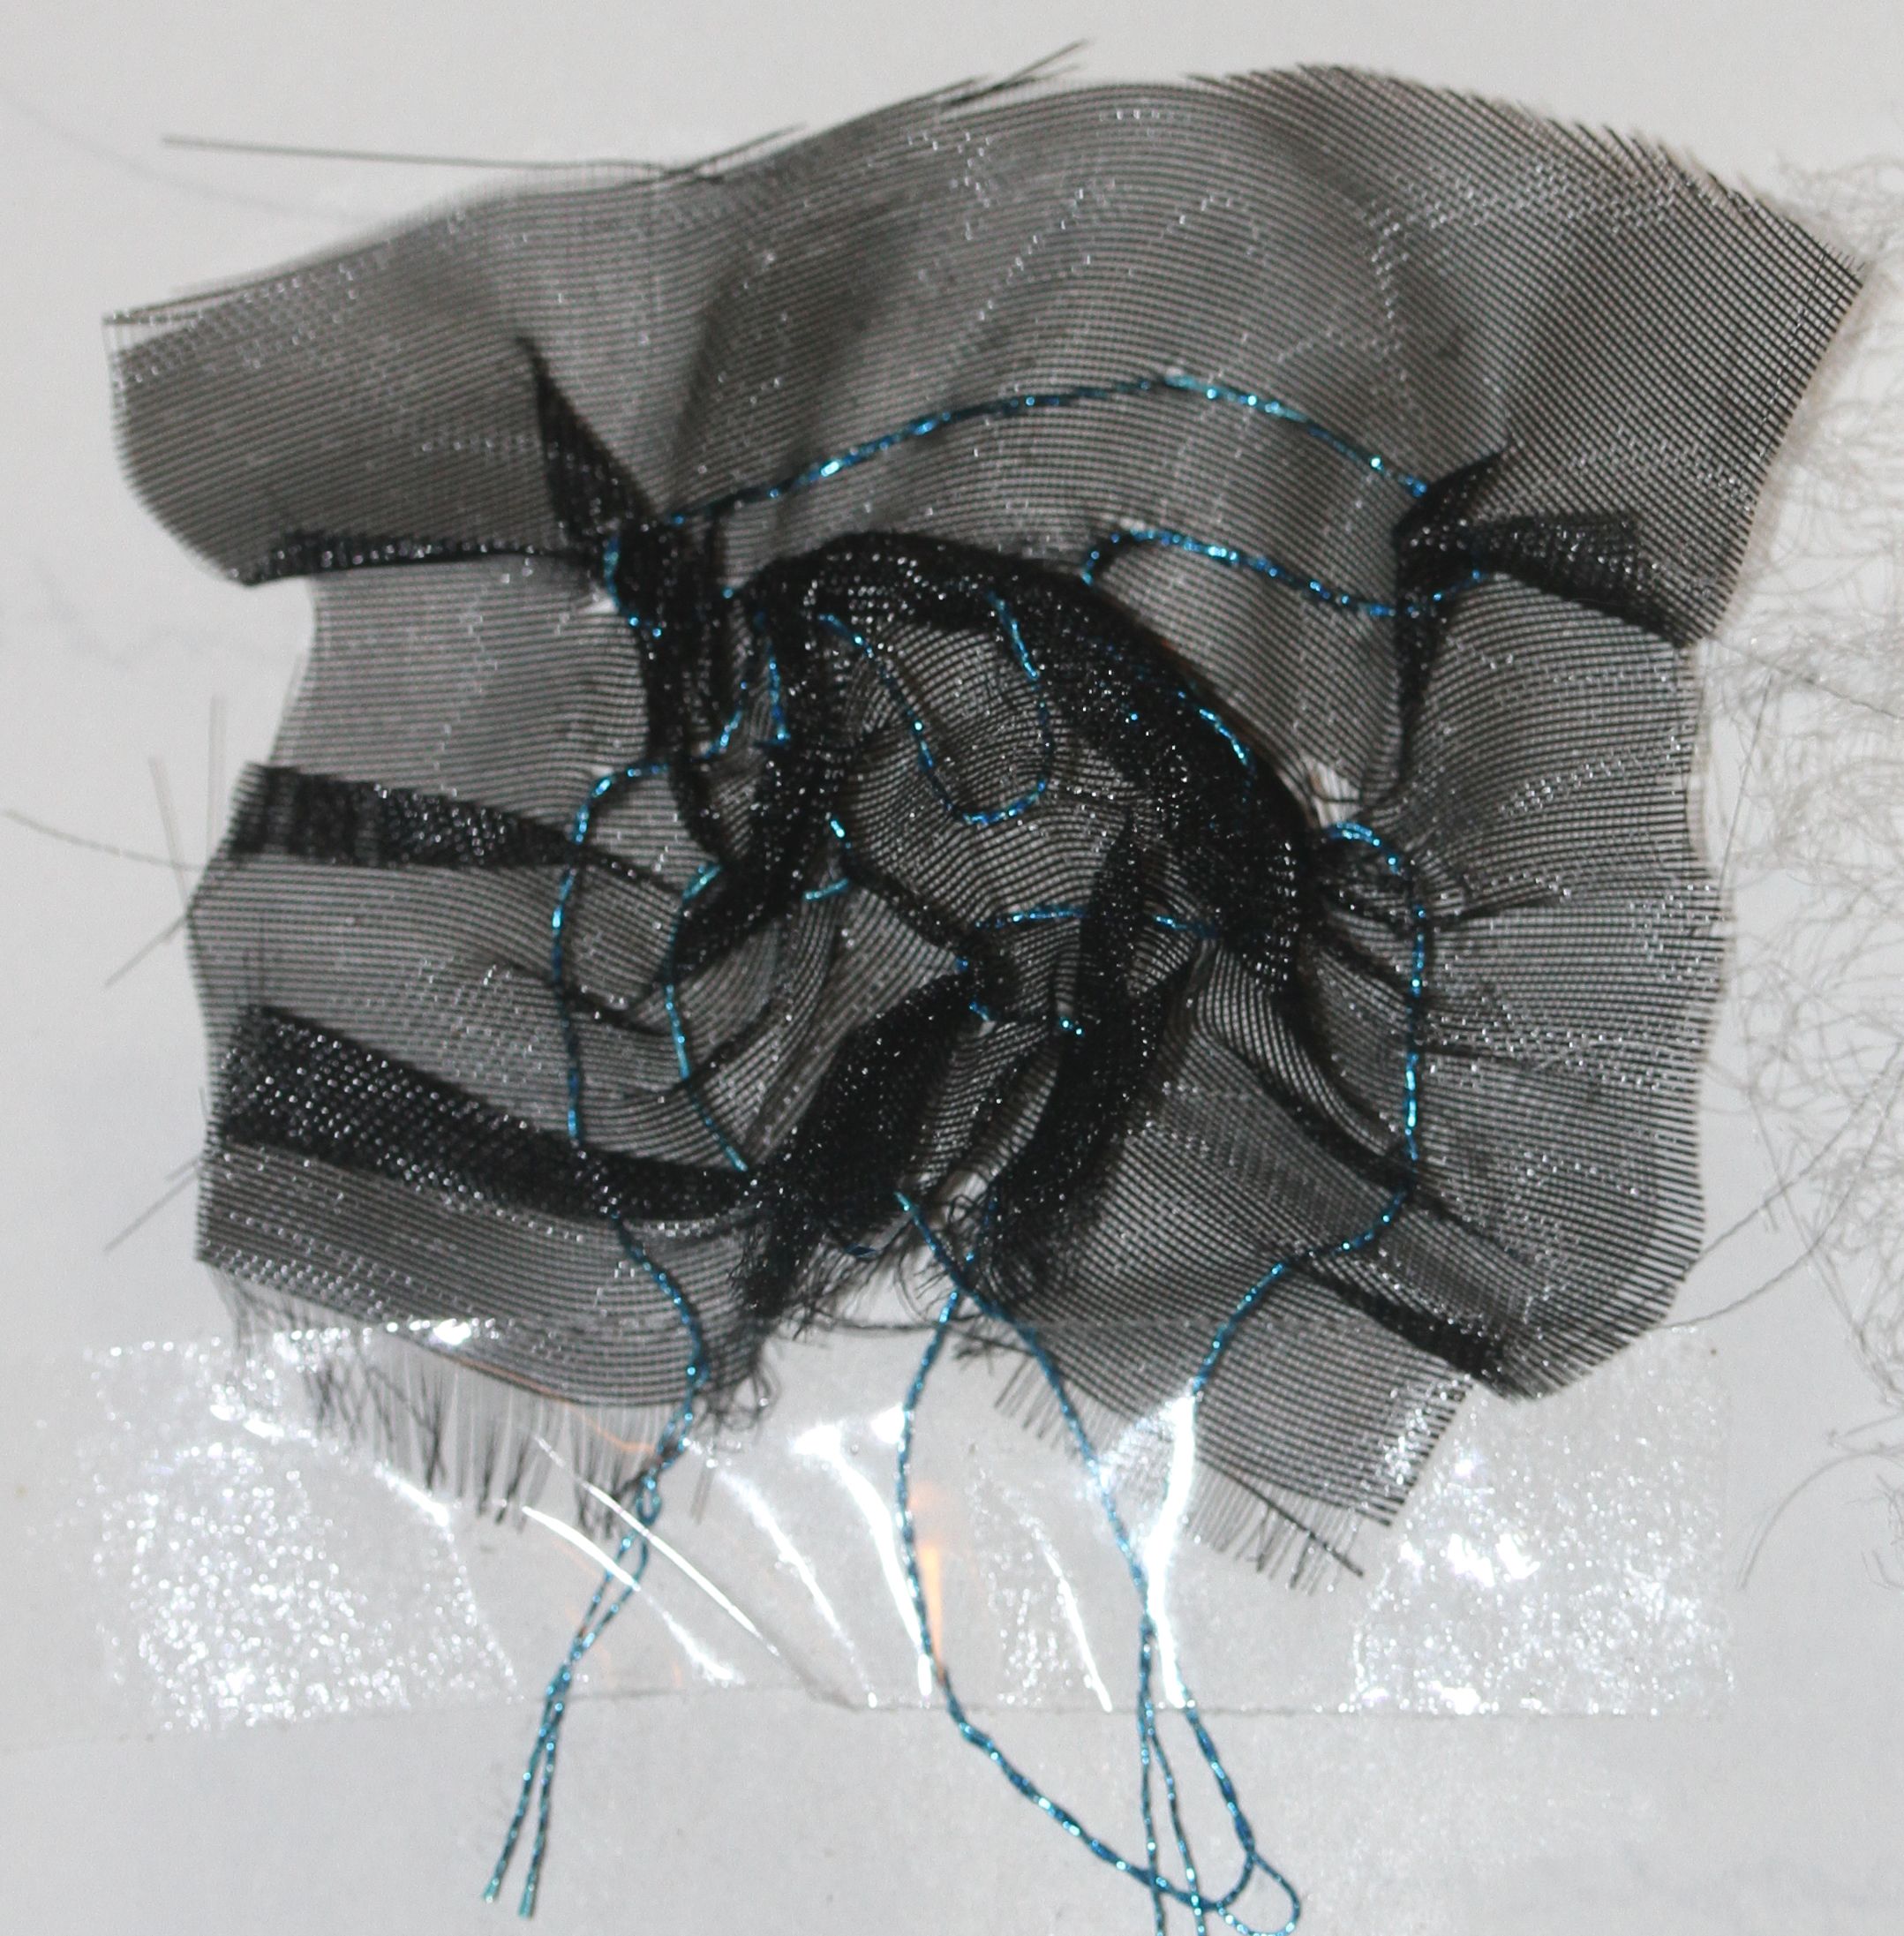
The stitched plastic piece from Exercise 2.3 intrigued me: the serendipitous discovery that the straight lines took on curved edges when stitched into this medium and seemed to ‘float’ and its delicacy. I was keen to use this as my inspiration for my collection.
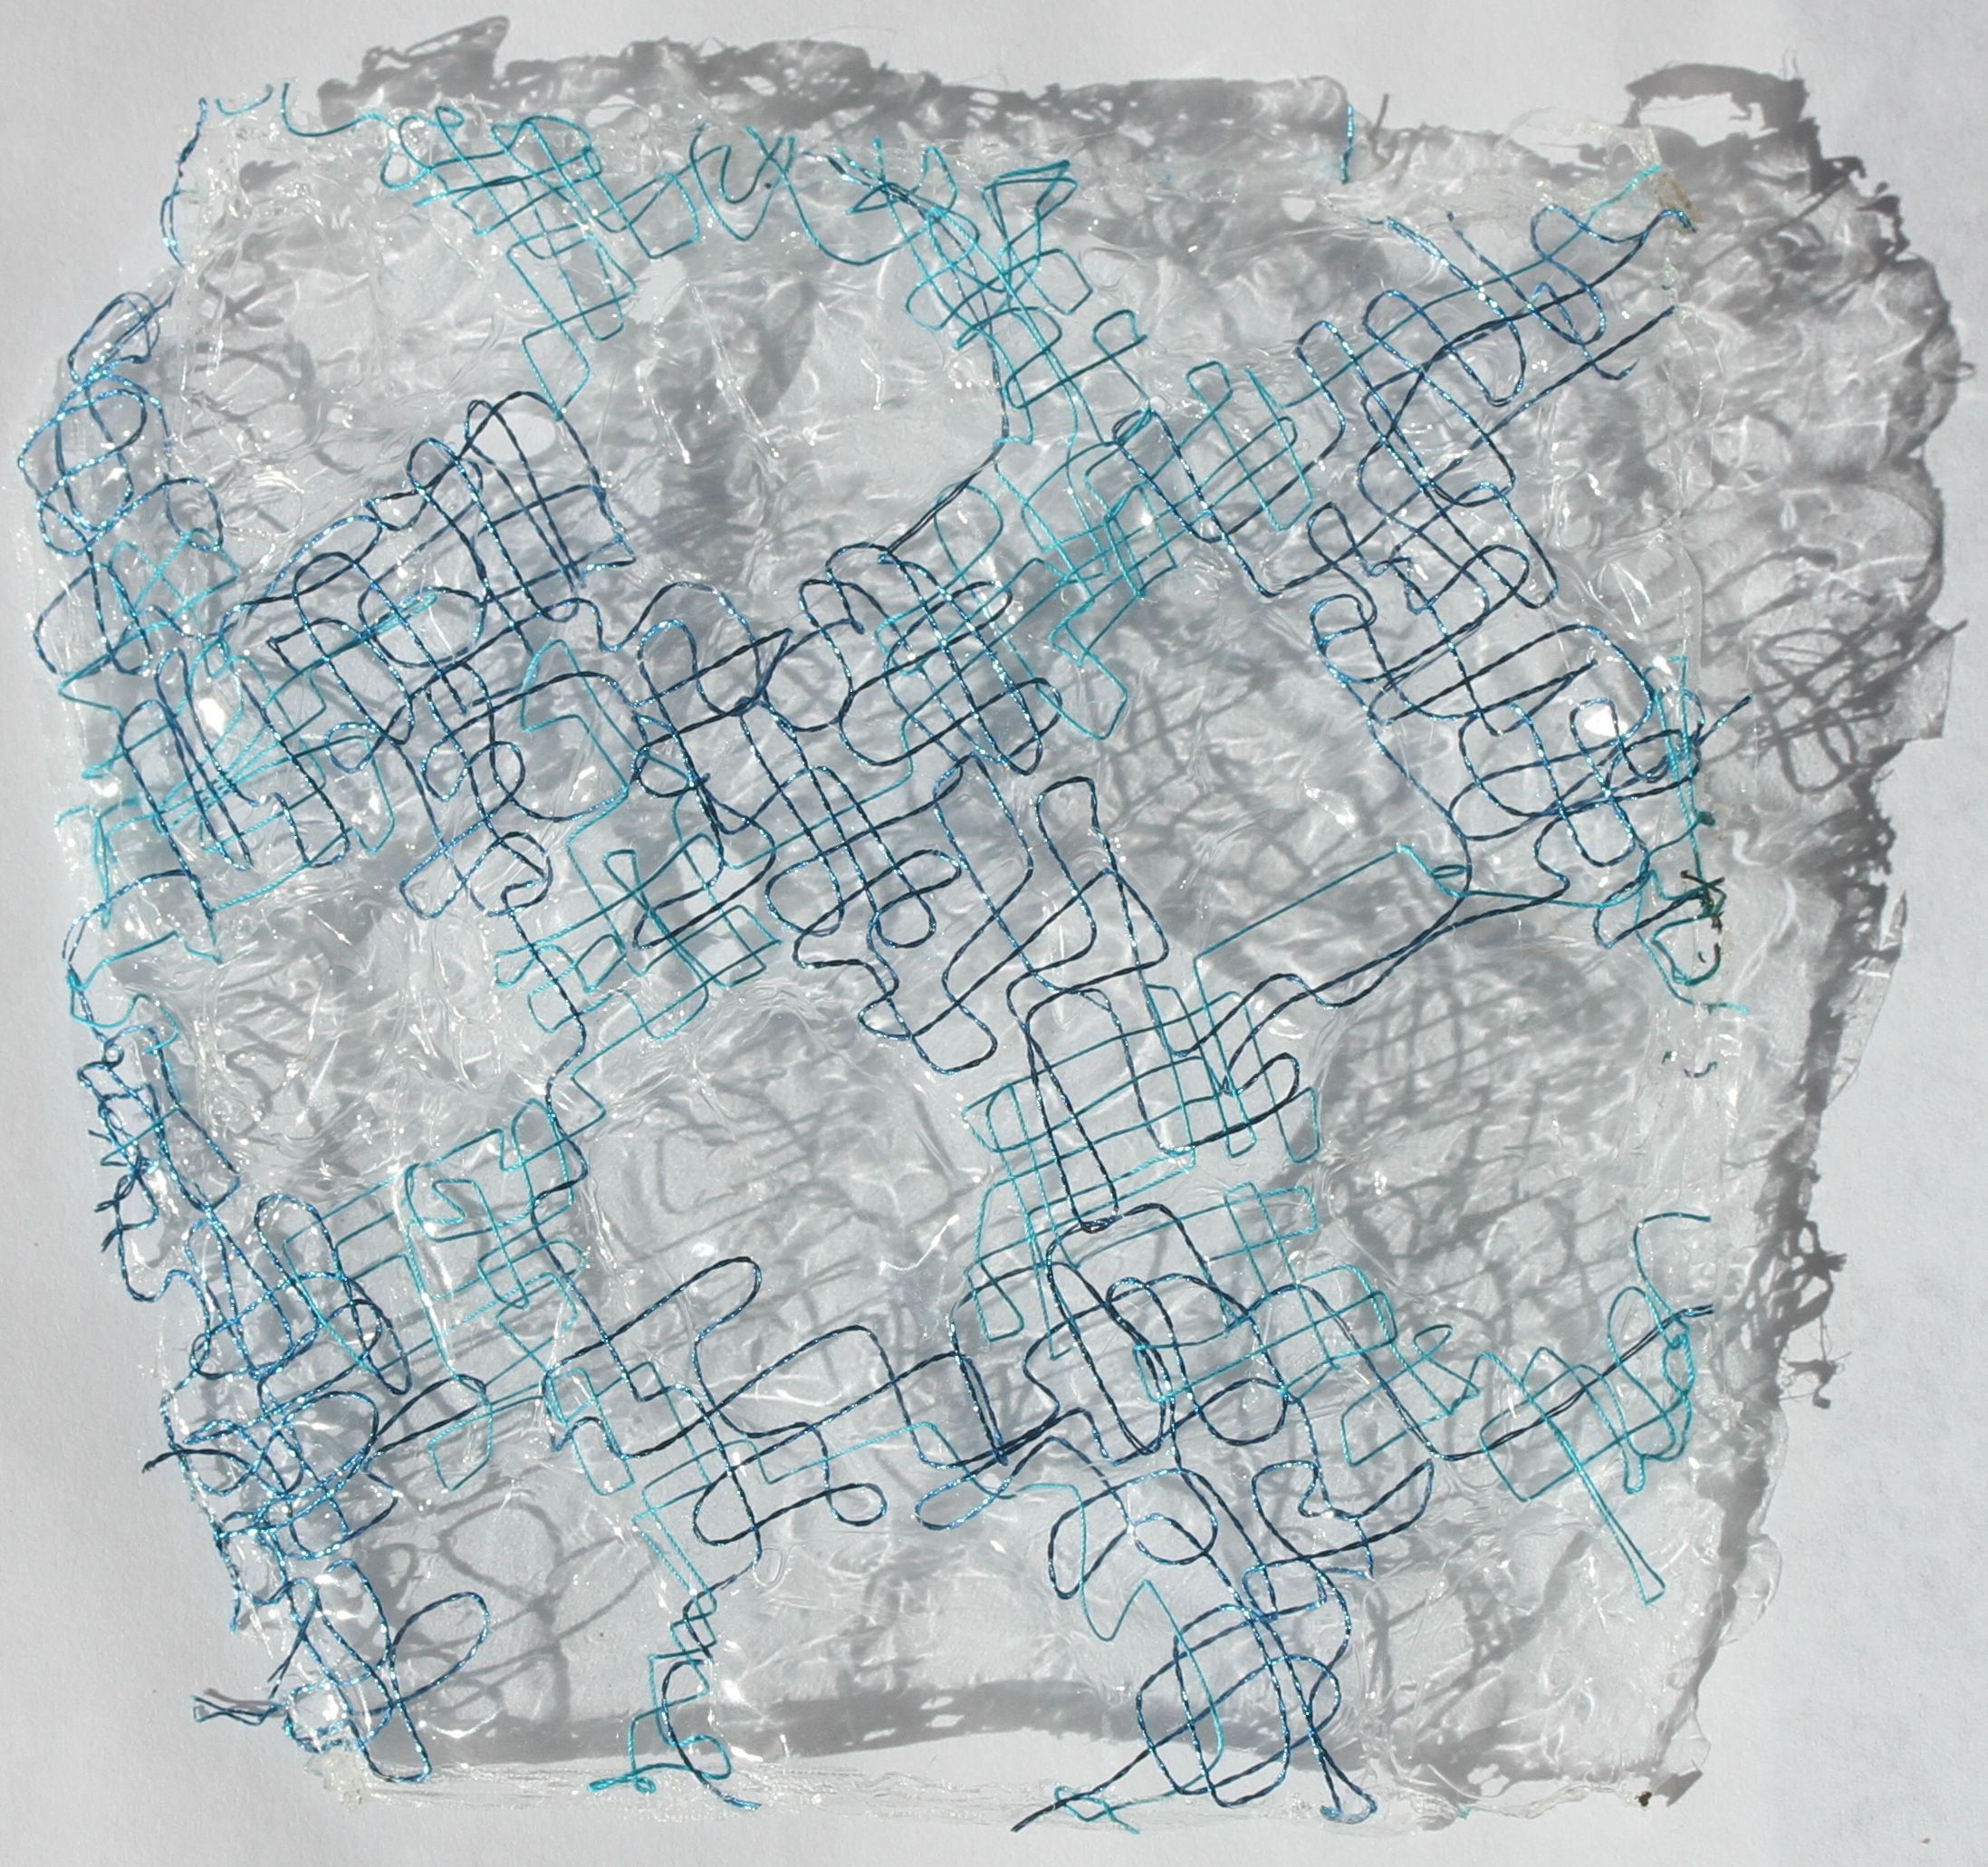
The two major aspects of this sample I wished to capture in my stitched pieces:
- transparency
- ‘floating’ threads
Additionally, I wished to employ:
- the motif of the stitched threads
- the teal colour from the original drawing and samples
Piece #1
Base Textile
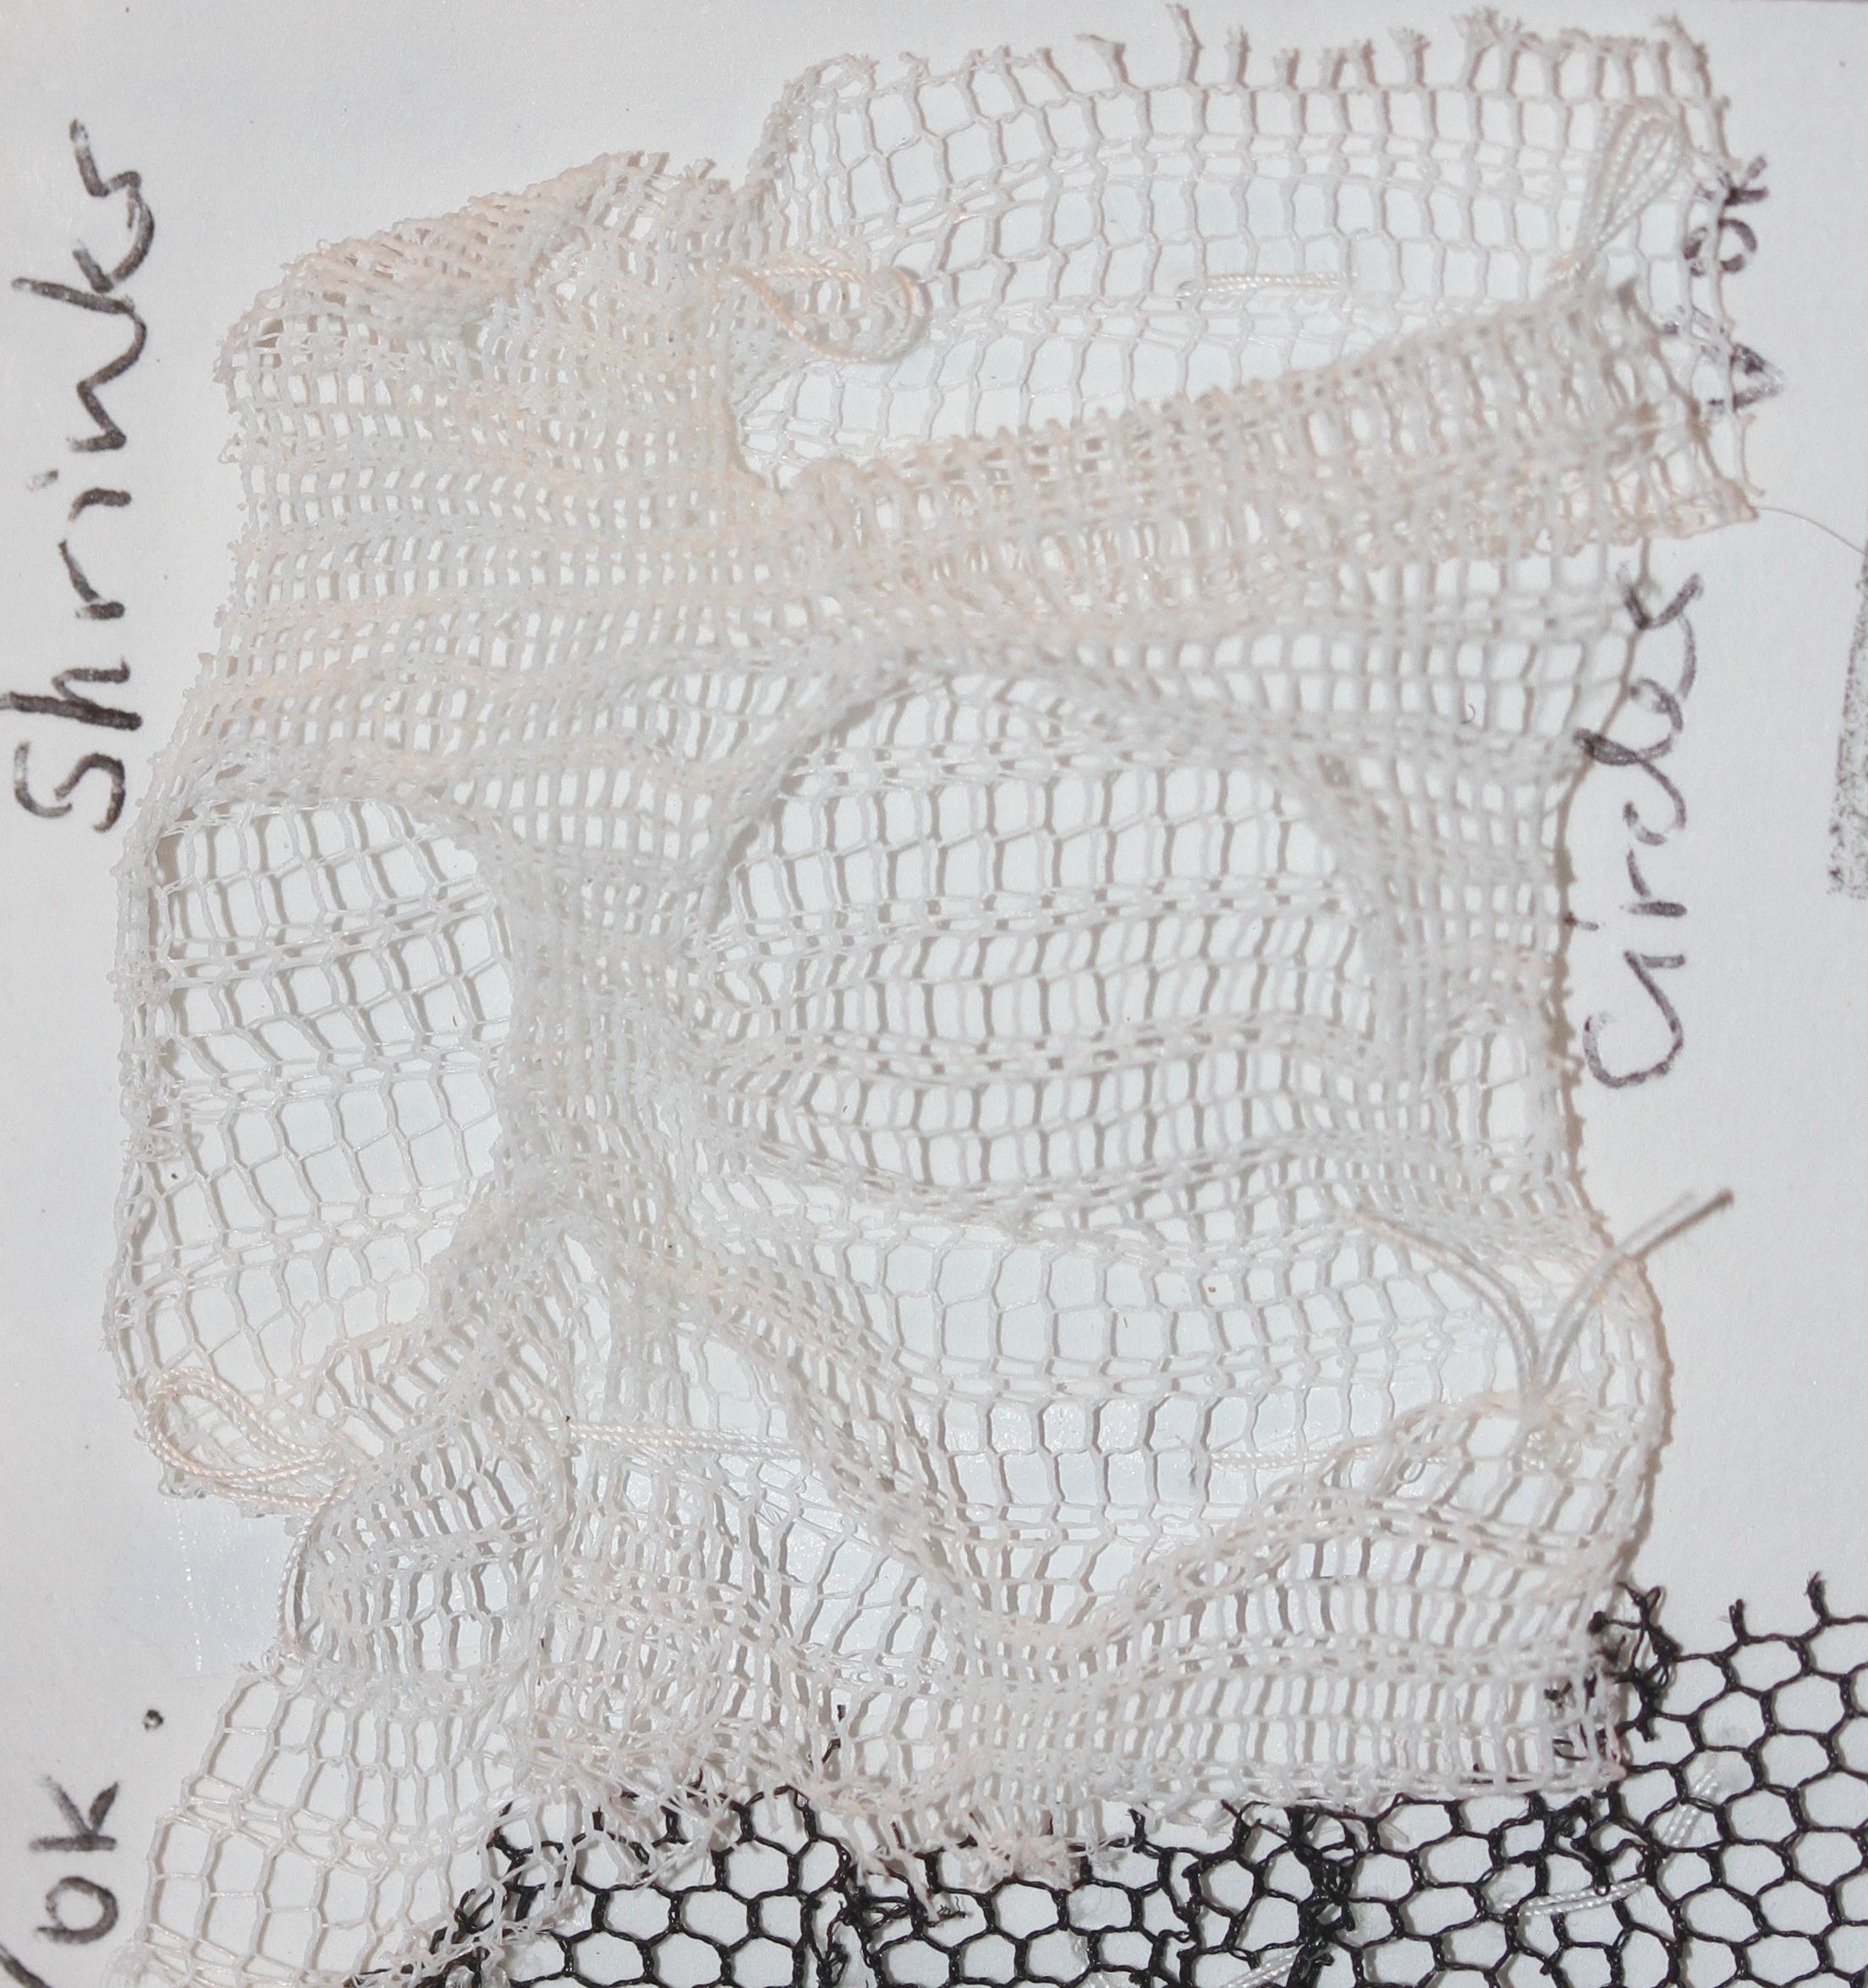
To capture transparency, I considered a range of transparent materials: silk and synthetic organza of varying colours and textures, and synthetic tulle, curtaining and knitted net. The transparency of the tulle was far superior to even the fine silk the organza.
With my first piece, I intended to reproduce the three-dimensional shrinking, melting and crumpling created by the action of the heat gun on plastic. I brainstormed a number of approaches to this:
- using the heat gun to reproduce the surface qualities of the melted plastic with synthetic fabric (which is just plastic)
- gathering the base textile to re-create the texture
1. The finest tulle and the netted curtaining melted into circular patterns, whereas the coarser tulle and the knitted tended to tear and burn rather than melt. The synthetic organza also gave the required texture under the heat of the gun.
 |
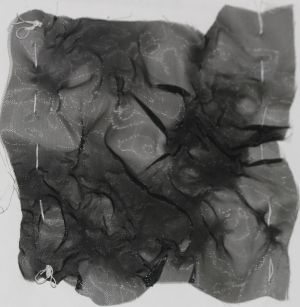 |
| Net Curtaining | Organza |
2. Gathered lightweight tulle, could provide even more three-dimensional volume than the heat treated samples, so this was my final choice. A a piece of lightweight tulle twice the width and height of my final piece was gathered at the edges and sewn to a piece of stiffer, heavier tulle cut to approximately A4 size. The stiffer tulle lay flat, while the finer tulle was able to crinkle and mold into hills and valleys.
I drew a layout diagram for the addition of later cutouts in which teal-coloured organza circles would be inserted. The shape of the cut-outs was marked on the piece with the addition of small white organza circles. My surface was prepared.
Stitch
There were two possibilities I wanted to explore with the stitch on this piece:
- creating texture between the circles in the design;
- determining whether the stitch motif could be ‘drawn’ with heat (in keeping with the heat techniques used on the plastic sample).
A quick test sample showed me that additional texture could be added by gathering the threads of the stitch motif:
Secondly, I conducted a series of experiments with a soldering iron to create marks similar to the stitched sample prompt. This opened a world of interesting possibilities!

Burning the stitch motif.
The main problem I encountered was that using the soldering iron to burn the stich motif into the organza resulted in overlapping lines creating small areas which fell out of the piece [centre sample in picture]. I considered burning the motif in one direction at a time, leaving ‘bridges’ to keep the fabric intact [left and right samples in picture].
It was time to do some research. I consulted Margaret Beal’s New Ideas in Fusing Fabric: Creative cutting, bonding and mark-making with the soldering iron (2013) in the hope that I didn’t have to re-invent the wheel! Margaret’s work solved several problems I had encountered with my earlier experiments:
|
Problems Encountered |
My Solution |
Margaret Beal’s Solution |
|---|---|---|
|
Incomplete fusing/cutting |
|
Use a ruler: pressure near the scored line gives good contact and clean cuts |
|
Crossing lines cutting out areas of design |
Partial cut-out, leaving ‘bridges’ |
Use a cut line resembling ‘running stitch’ |
|
Don’t want the appearance of ‘running stitch’ |
|
Draw or stitch back over to make a solid line |
As I was experimenting, it struck me that I had diverged somewhat from the intent of the assignment, which was to employ stitch! I reset my direction. However, these early experiments led into ideas for my later pieces, so I have included them here.
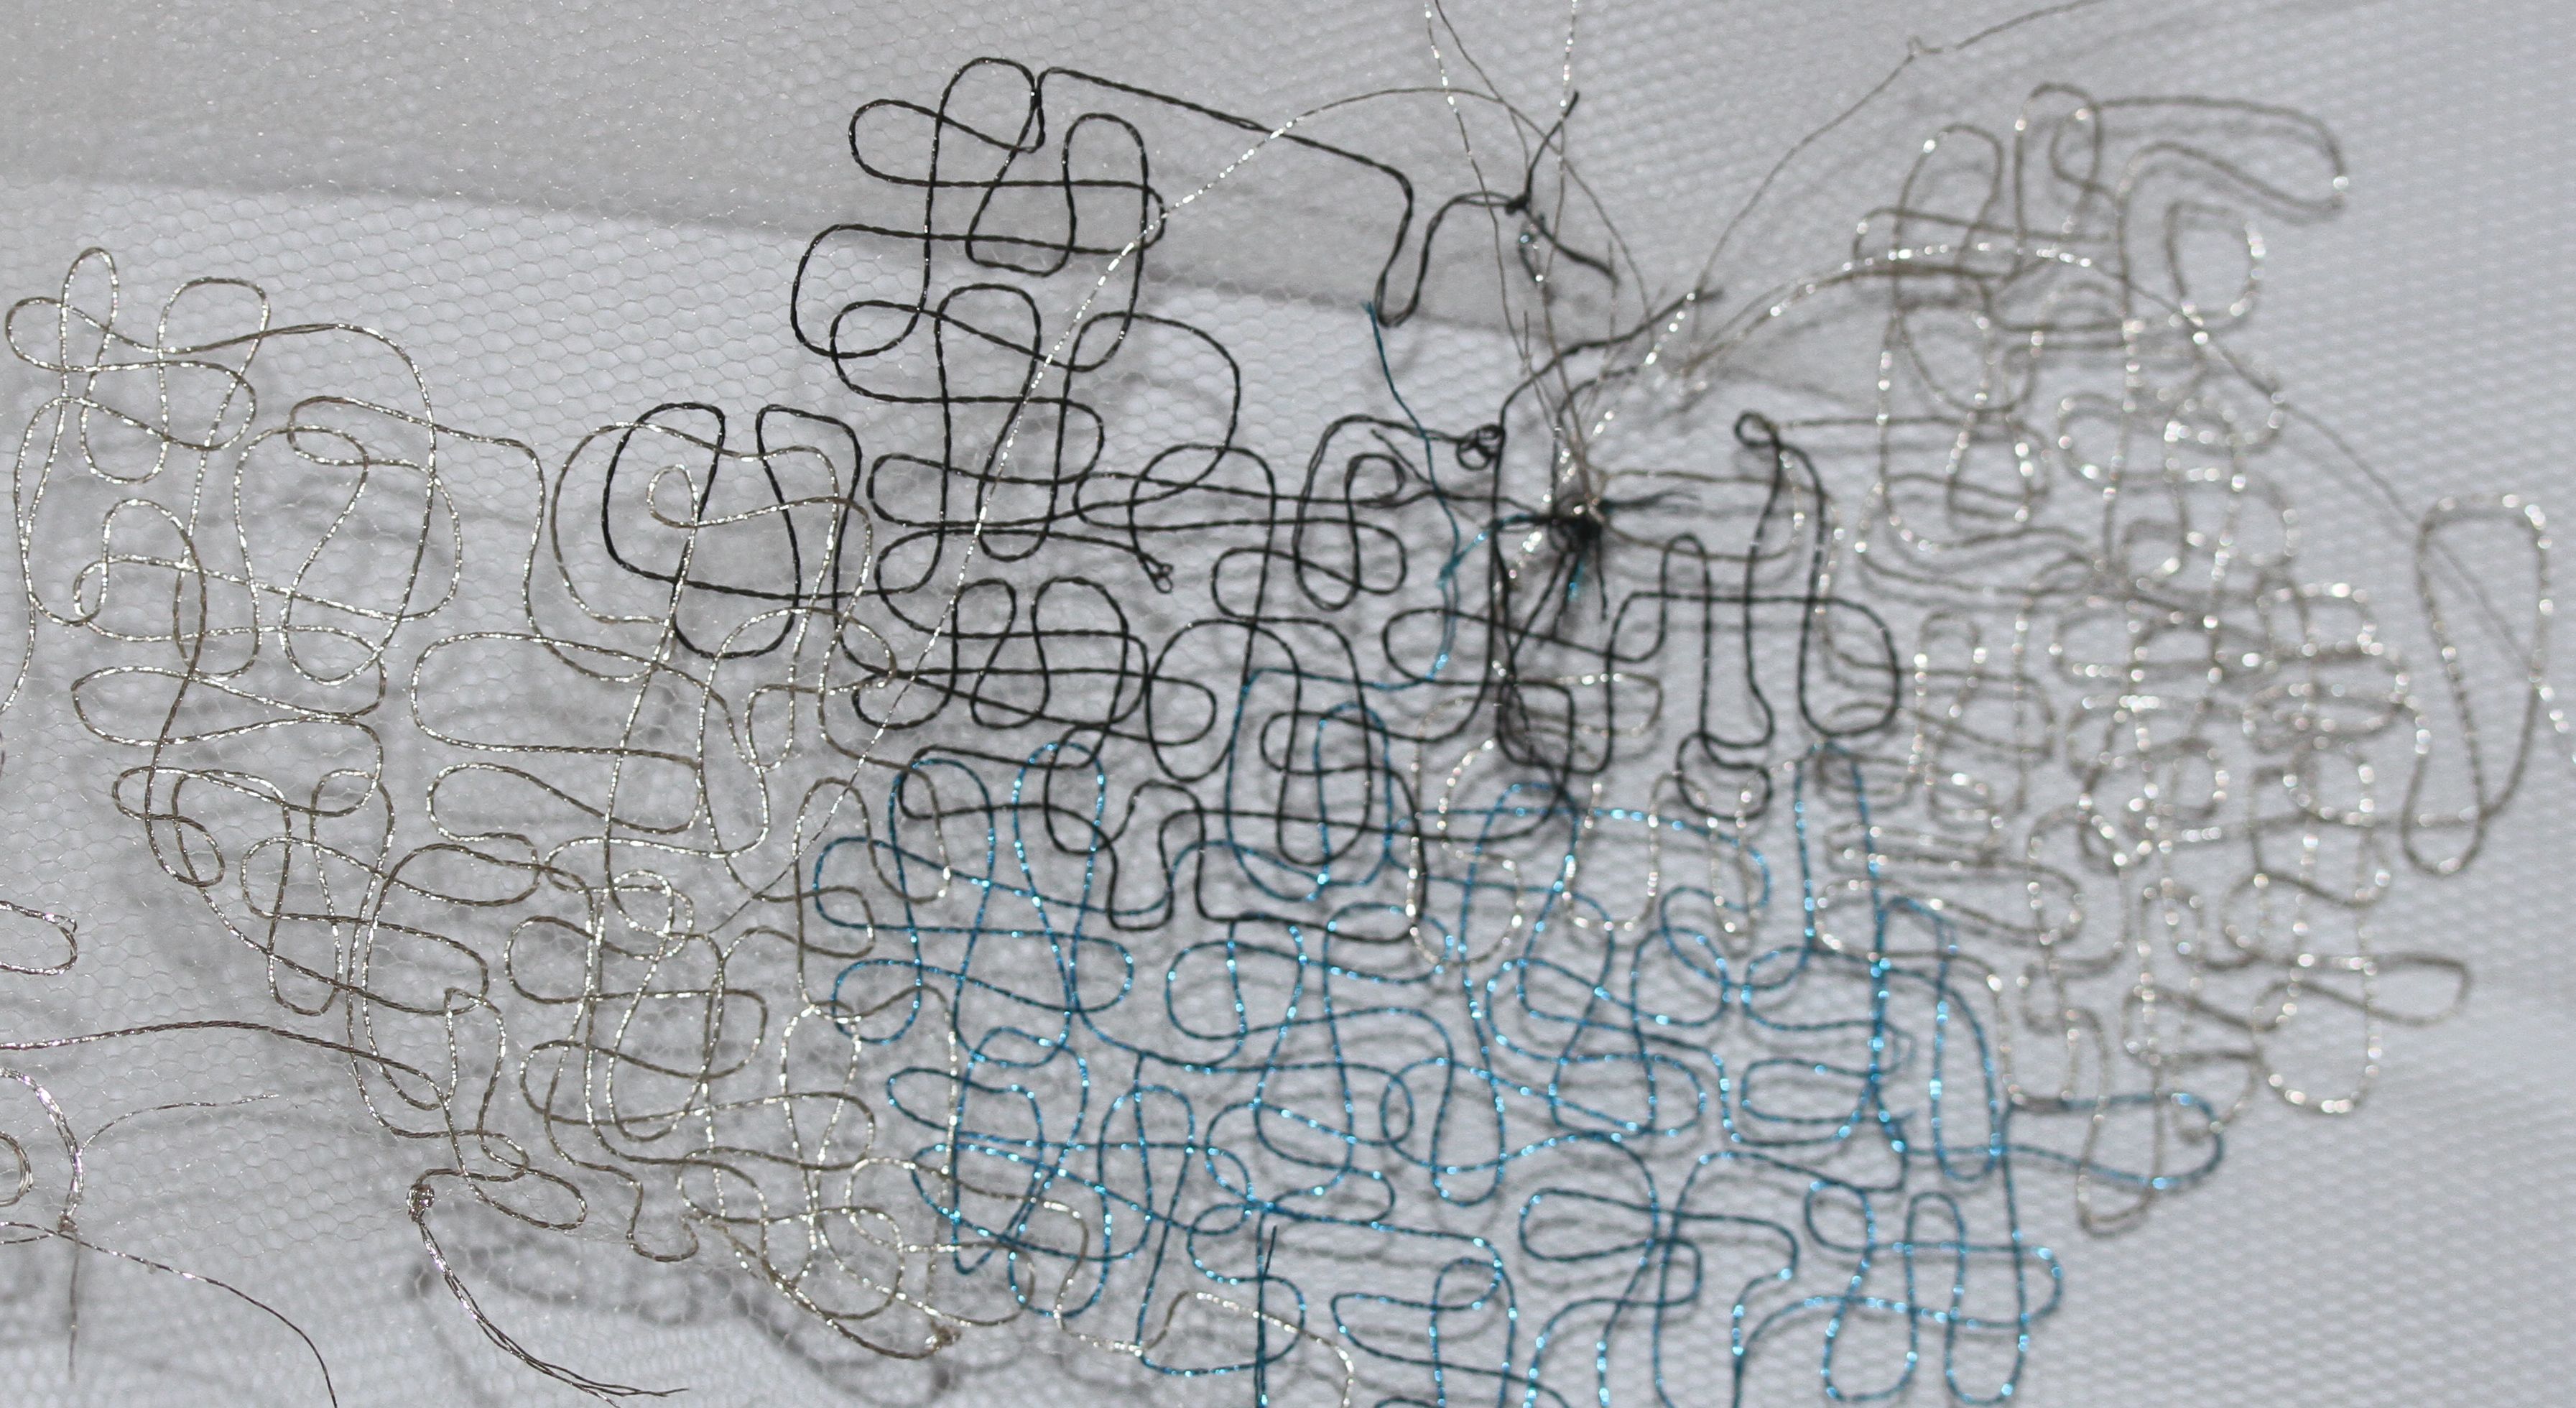
Choosing Threads (link to sketchbook page). My initial samples employed the teal metallic thread used in the plastic prompt sample, as this was the origin of the curving stitch motif. I then introduced black, silver and grey metallic threads to assess the look of these.
I found the use of multiple colours confused the piece, diminished the relative intensity of the teal metallic thread (which I had hoped to be the major focus), and made the piece unsuitable for display on black or white.
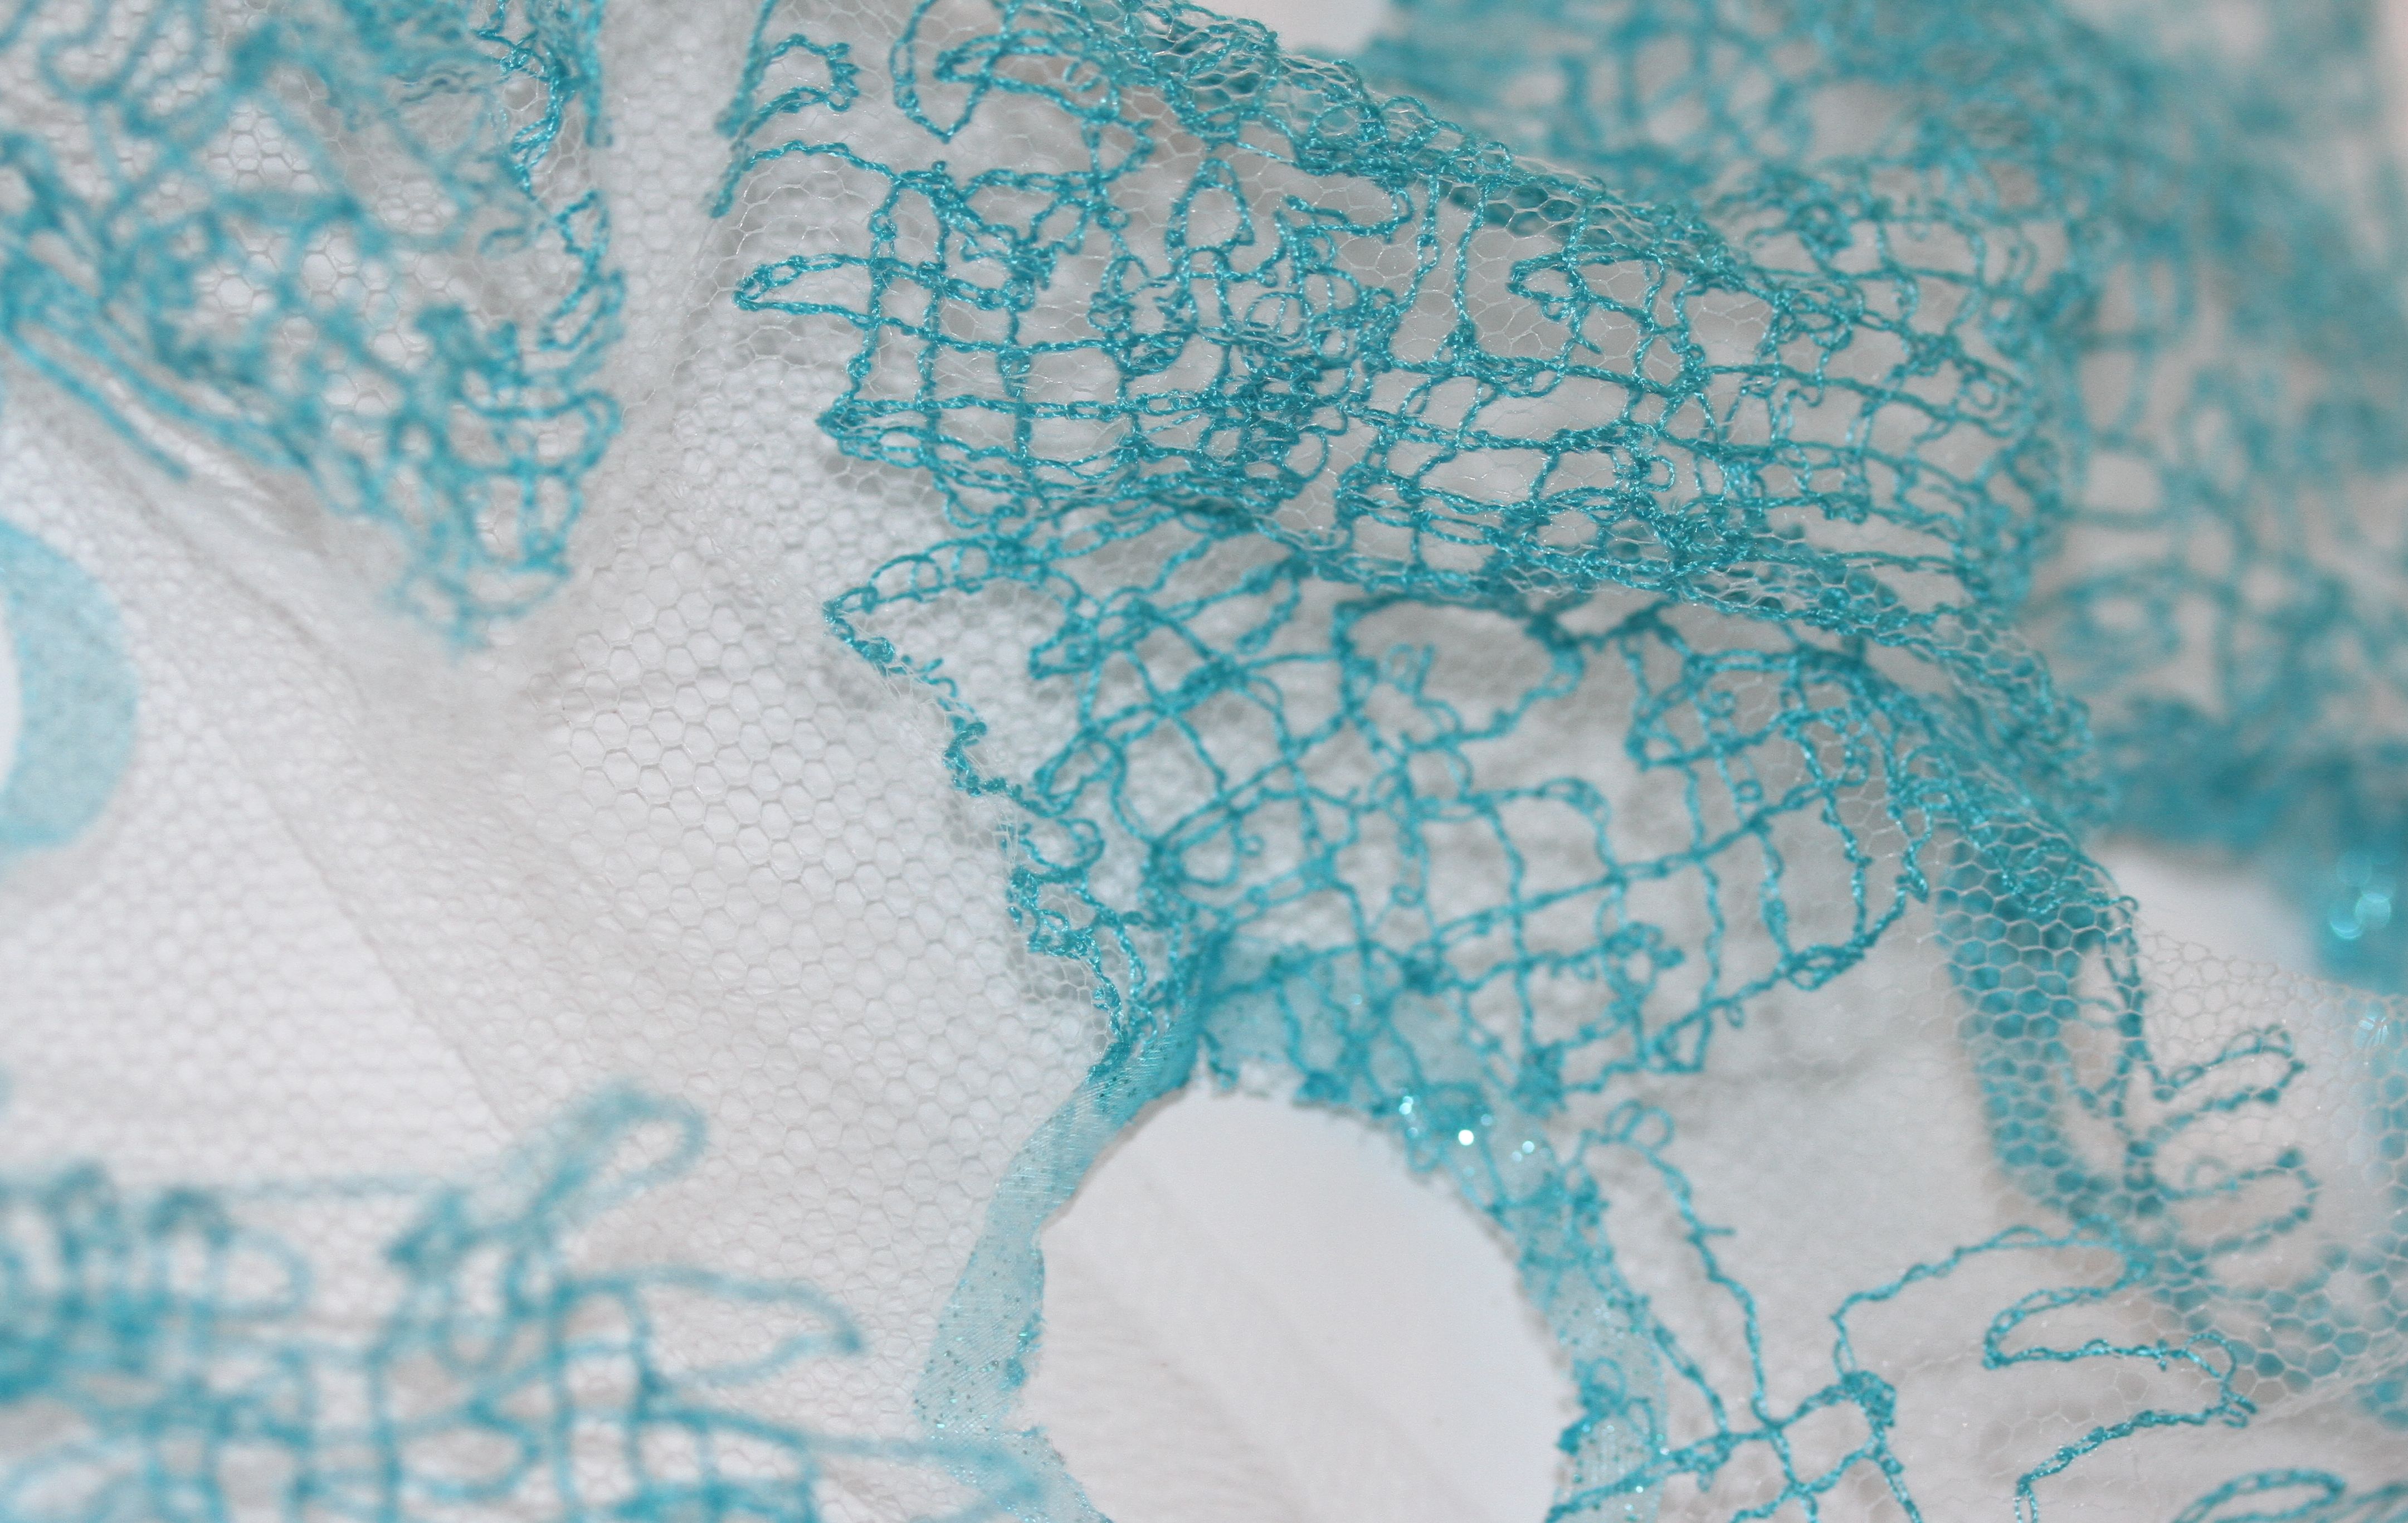
Further sample with teal rayon embroidery thread were much more satisfactory. The sheen of the rayon gave subtle variation in the shade that added the interest I was seeking, while spotlighting the rich teal blue shade. I began stitching in earnest.
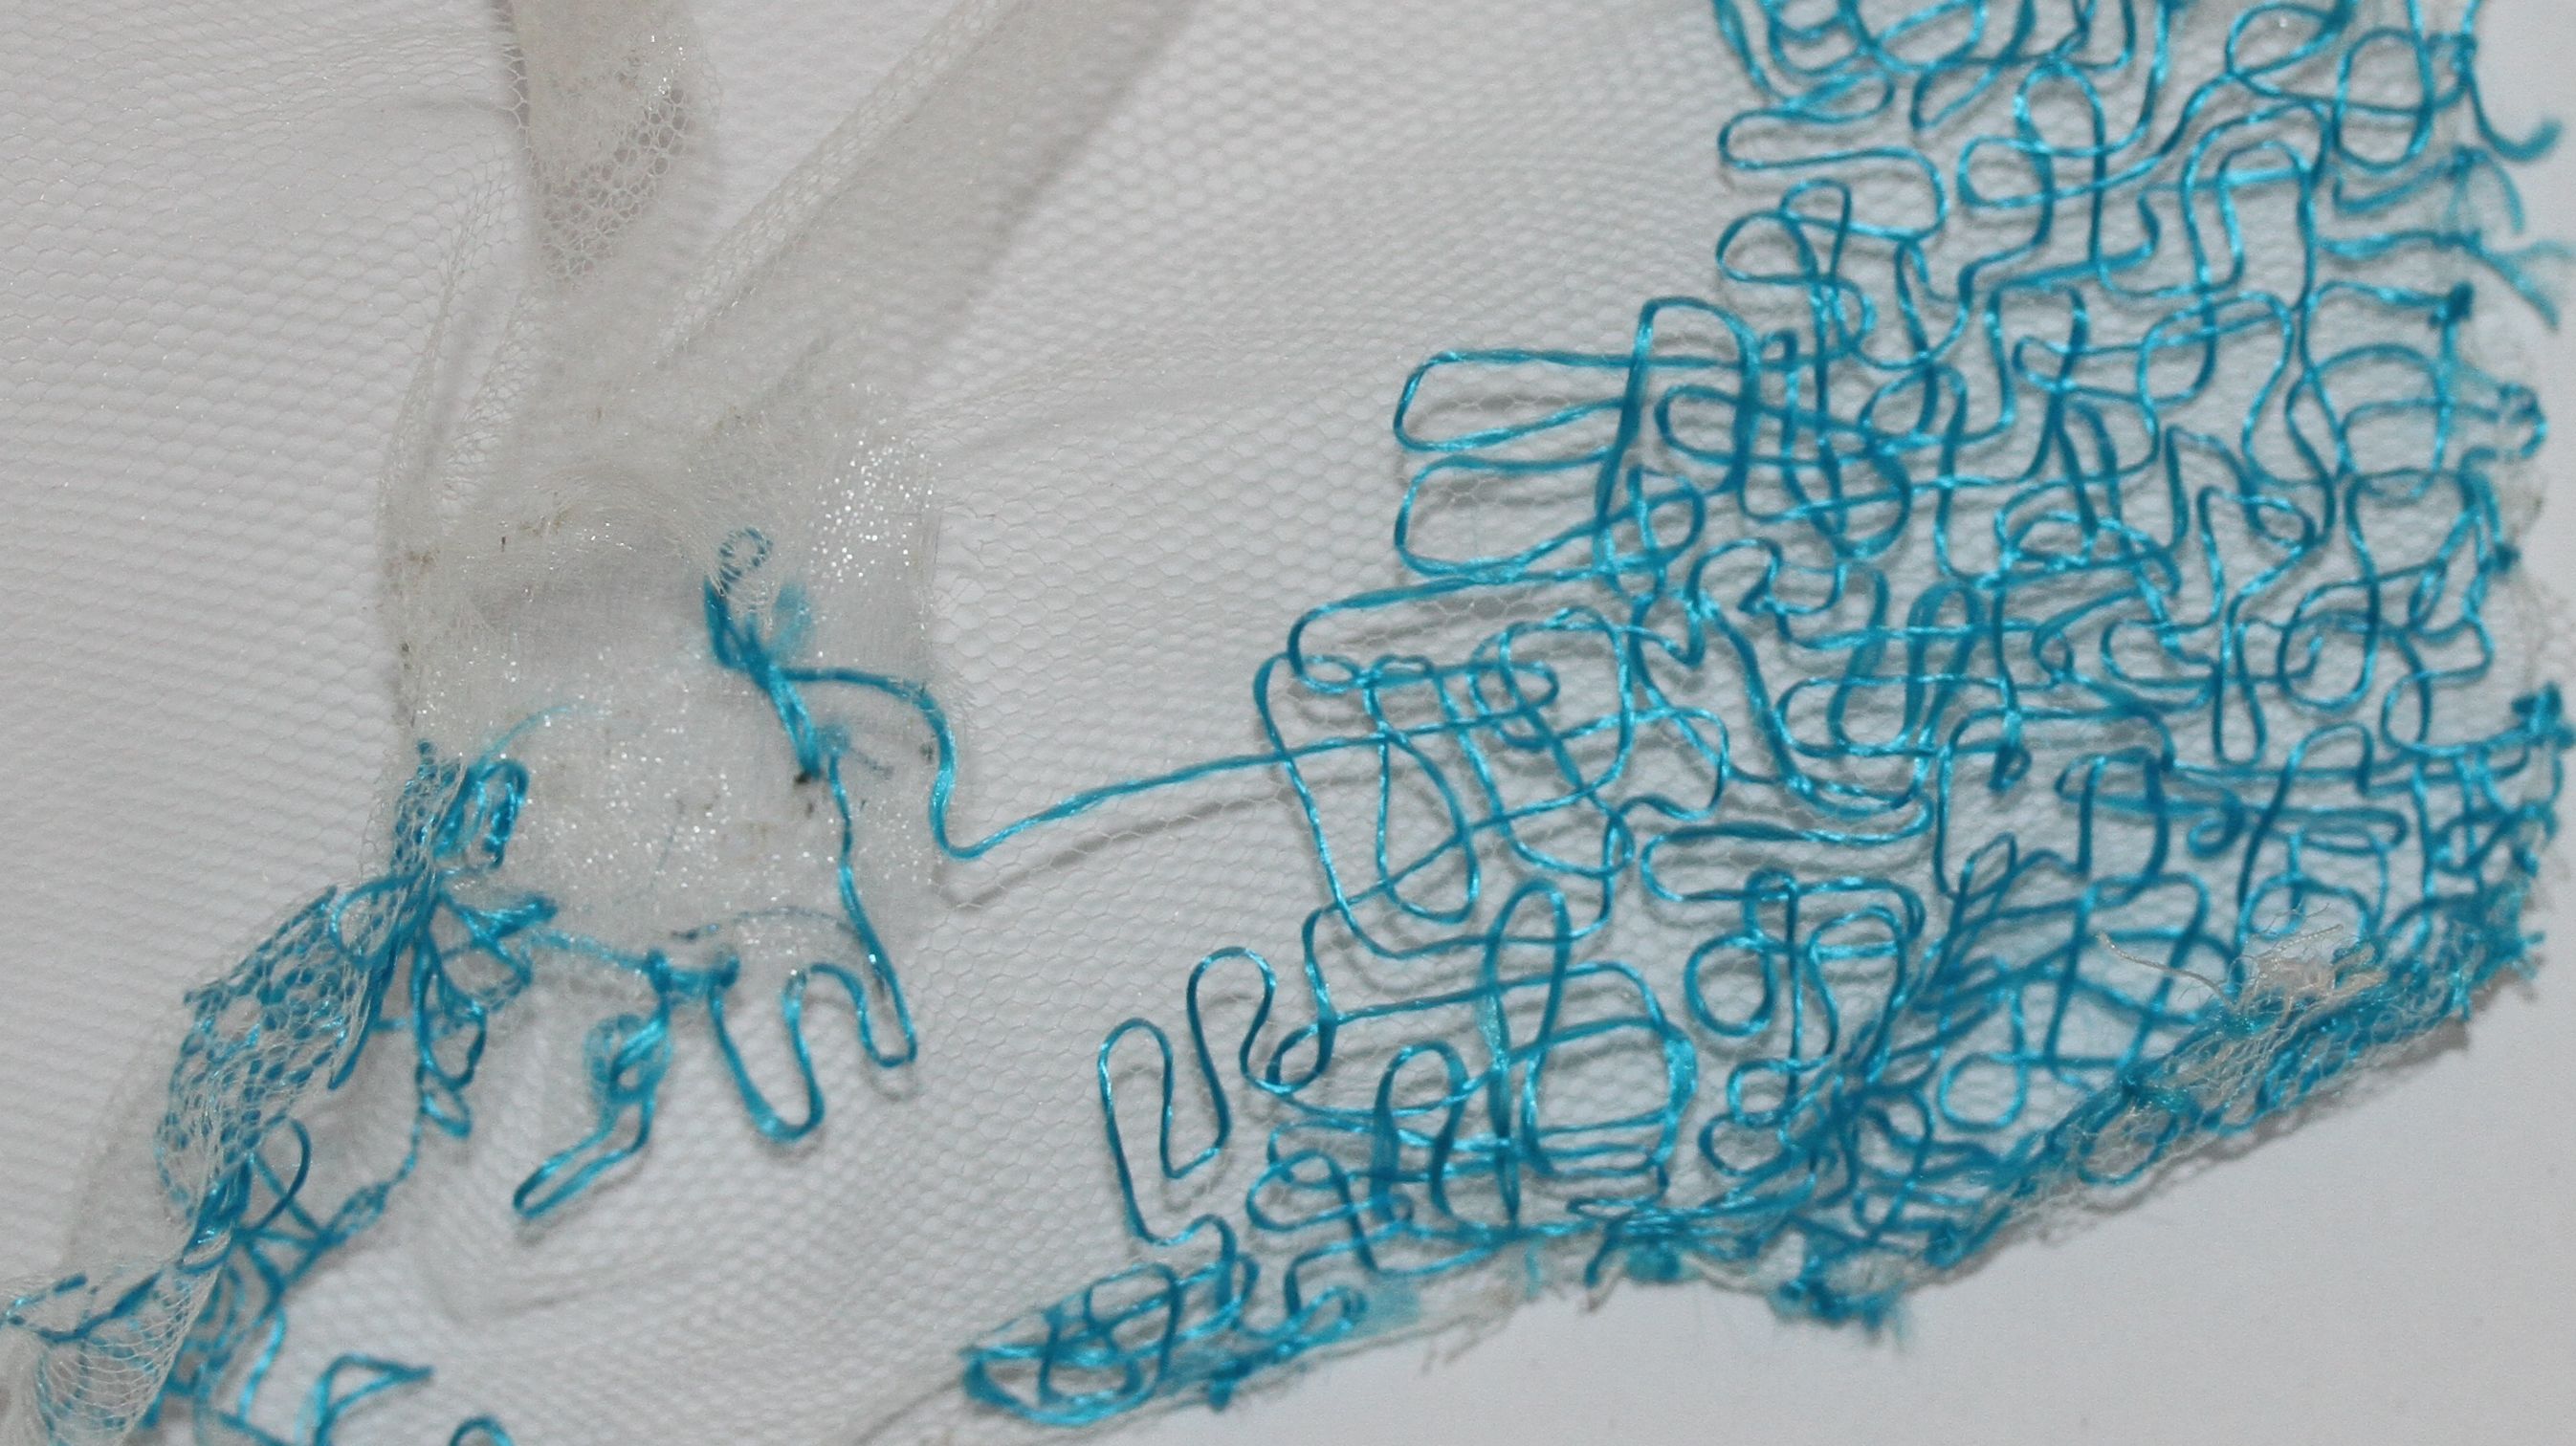
White organza was added as per my layout diagram. I used these points are places to anchor my stitches.
After several weeks of hand-stitching samples and my initial piece, I realised that the time commitment I had just taken on was untenable. Although I was incredibly pleased with the appearance of the piece, I resolved to machine stitch the tulle with a teal polyester (chosen so I could cut it with the soldering iron later) dressmaking weight thread.
The lightweight tulle had to be stitched before attachment to the stiffer backing piece; unlike with the hand-stitched version. It proved incredibly difficult to machine quilt; it gathered and ripped under the foot. I had been introduced to using “solvy” soluable fabric stabiliser in a workhsop several years ago with Australian textile artist Caroline Sharkey. Reinforcing the tulle with the stabiliser made machine quilting the motif possible.
I had intended to fill the entire piece of tulle with the stitch motif; however, by chance I left the unfinished piece lying on the table when my bobbin required re-filling. Looking at the piece from a grater distance, it became obvious that the white space yet to be filled looked great, and that entirely covering the tulle would not be as visually interesting. I had made a note to myself to consider white space more frequently when I examined Roanna Wells’ work.
Thus, I limited further stitching to swathes across the tulle.
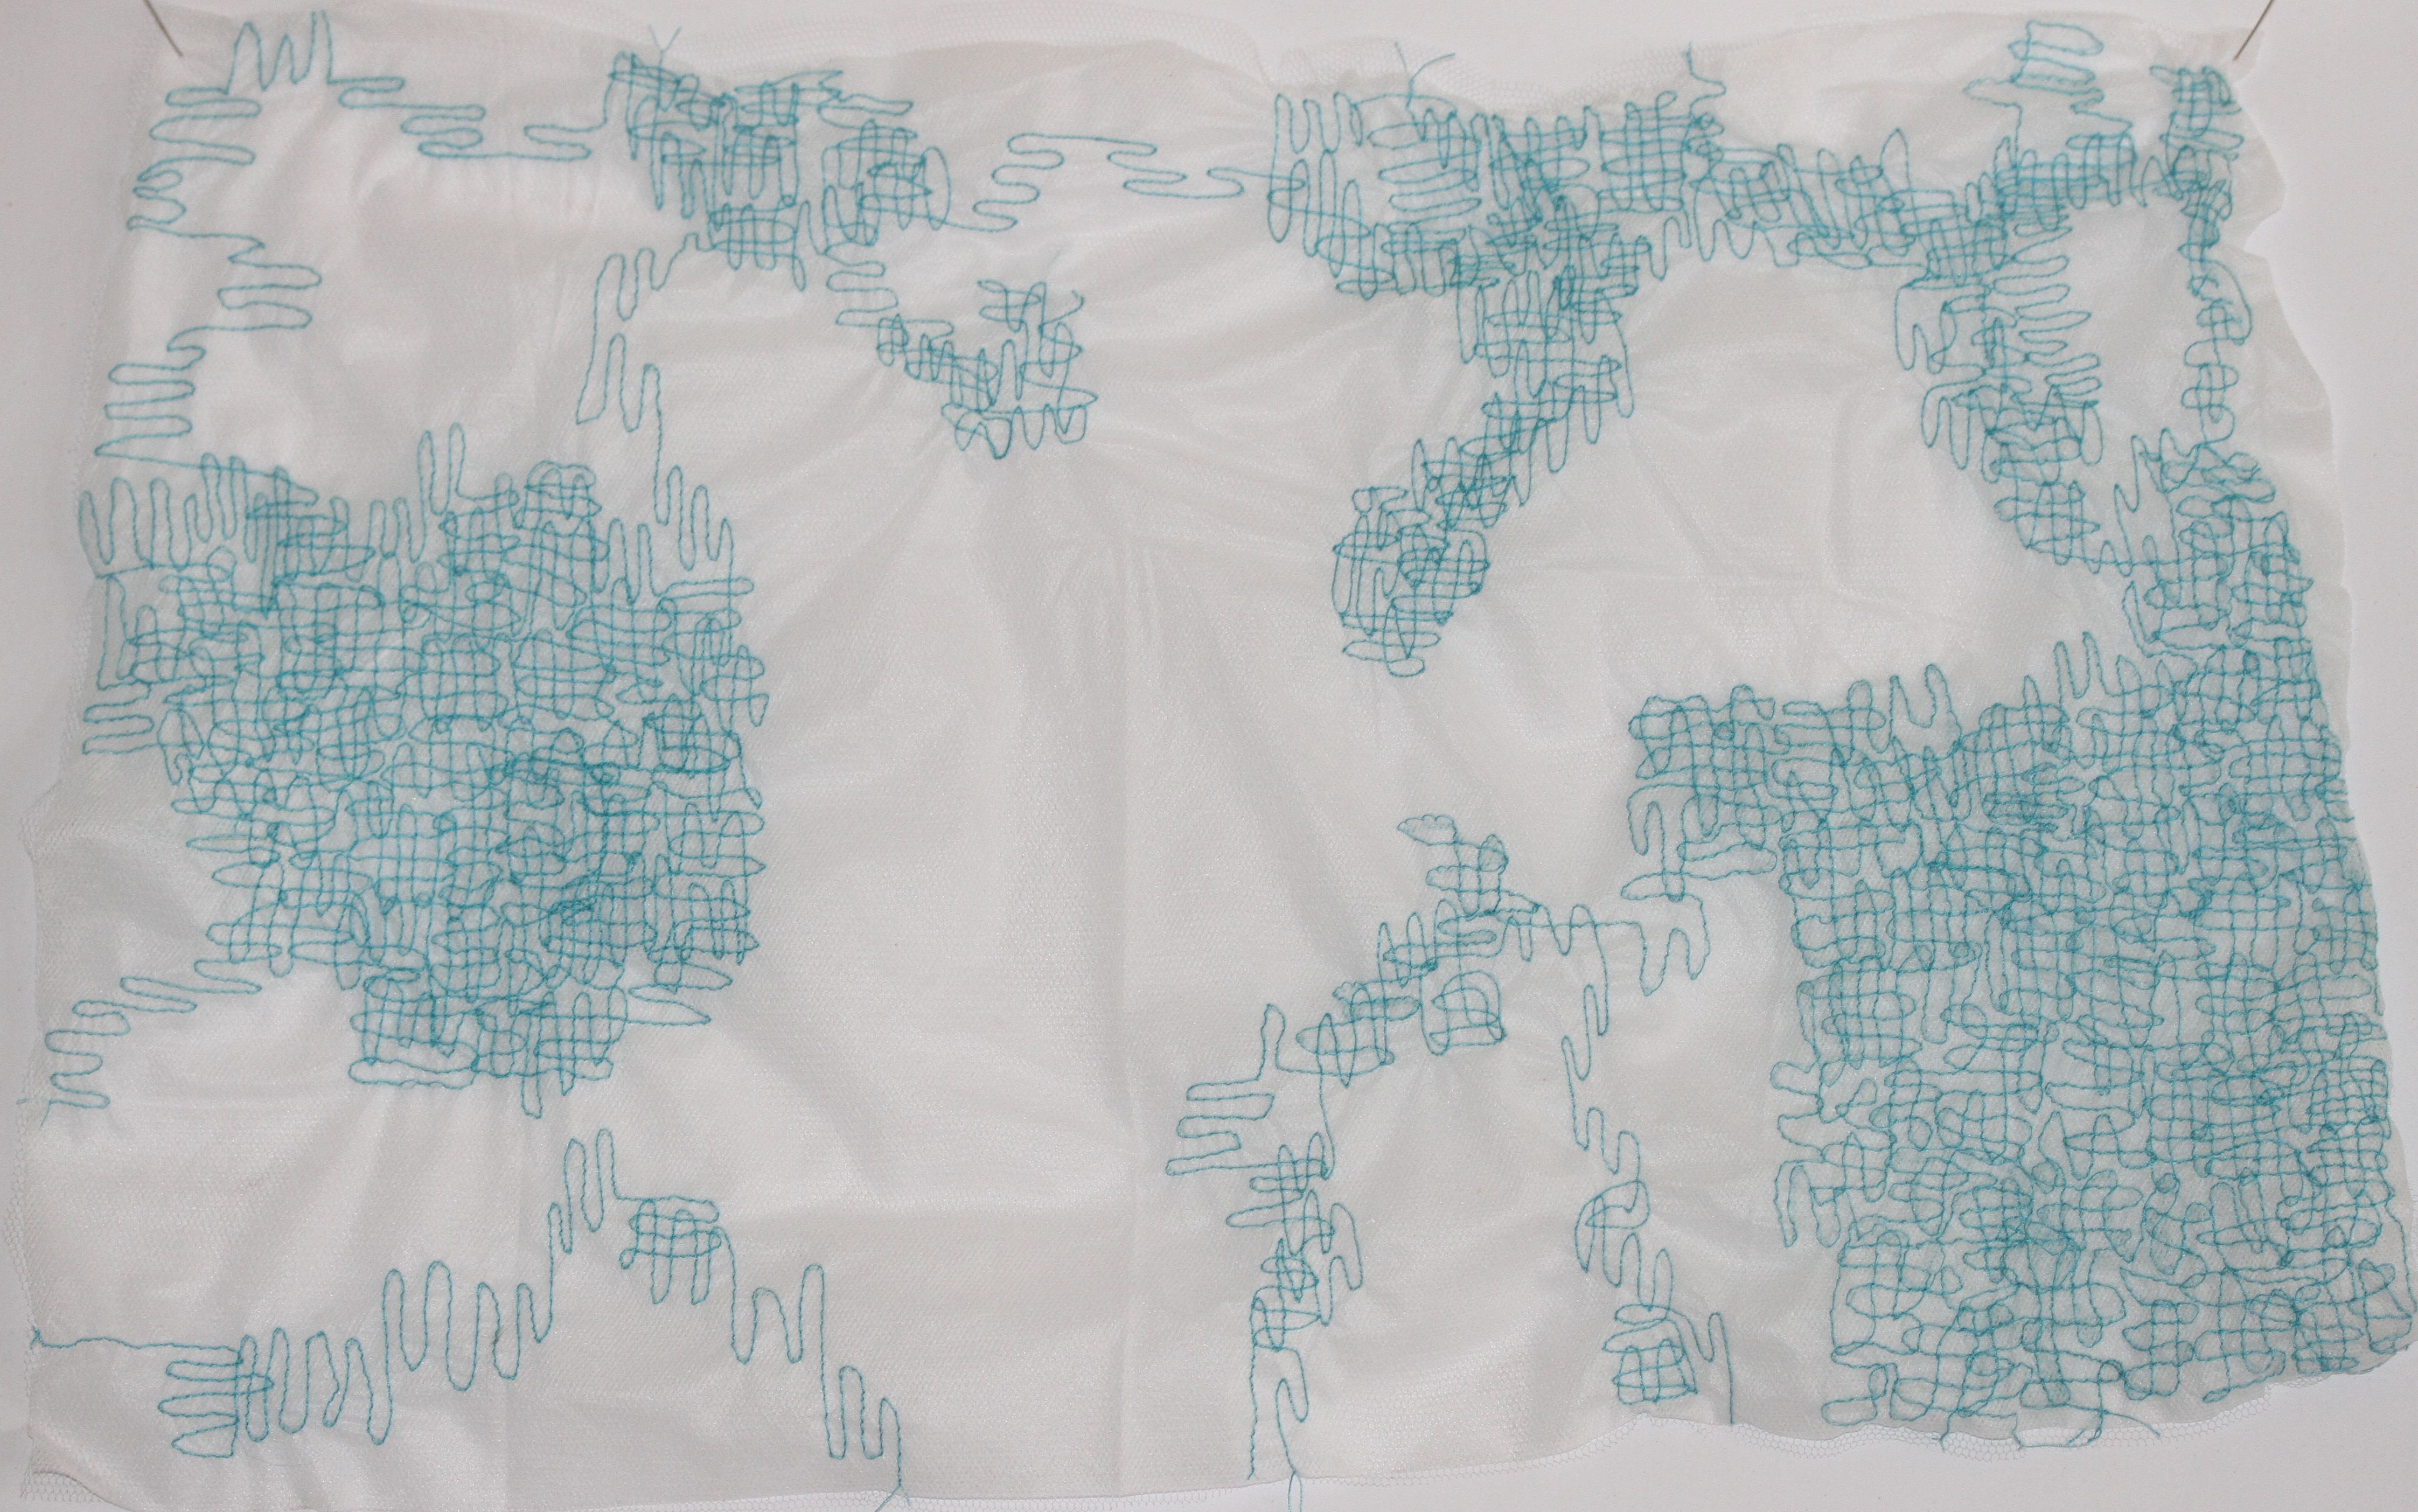
Machine stitching complete, with “solvy” still in place.
The “solvy” was removed with warm water and the resulting piece gathered at the edges and sewn to another A4 size stiff white tulle backing.
My exposure to Margaret Beal’s work taught me how to cut the holes in the work, resulting in fusing the two layers together and giving a finished edge; this would be the method employed to create holes through both layers of tulle and stitching.
The earlier experiments with the soldering iron had furnished a method for cutting fused-edge (prevent fraying) teal organza circles.
But, a new dilemma arose, that I had not sufficiently solved with the hand-stitched version: how to drop an organza circle into a precut hole?
Further experimentation, threw up several options:
- to run the soldering iron between the tulle circle and the edge of the hole; this attached the teal circle but was very fragile connection
- to attach larger teal circles across the holes leaving space to fuse using a melted ‘running stitch’;
- to place larger teal circles before the hole was cut, leaving a teal border around the hole;
- to fuse the teal circles to the tulle without cutting a hole (using a melted border around them); this leaves the tulle layer in place
- use clear nylon thread to whip stitch the teal circles in place over the hole; potentially unattractive.
In the end, placing a larger teal circle before the hole was cut, leaving a teal border around the hole was quite attractive: it gave the spark of teal colour I wanted, it gave a robust fused edge, and avoided the use of melted ‘running stitch’ or other marks on the organza. This method was employed, despite being a slight departure from my original vision.
Final Product
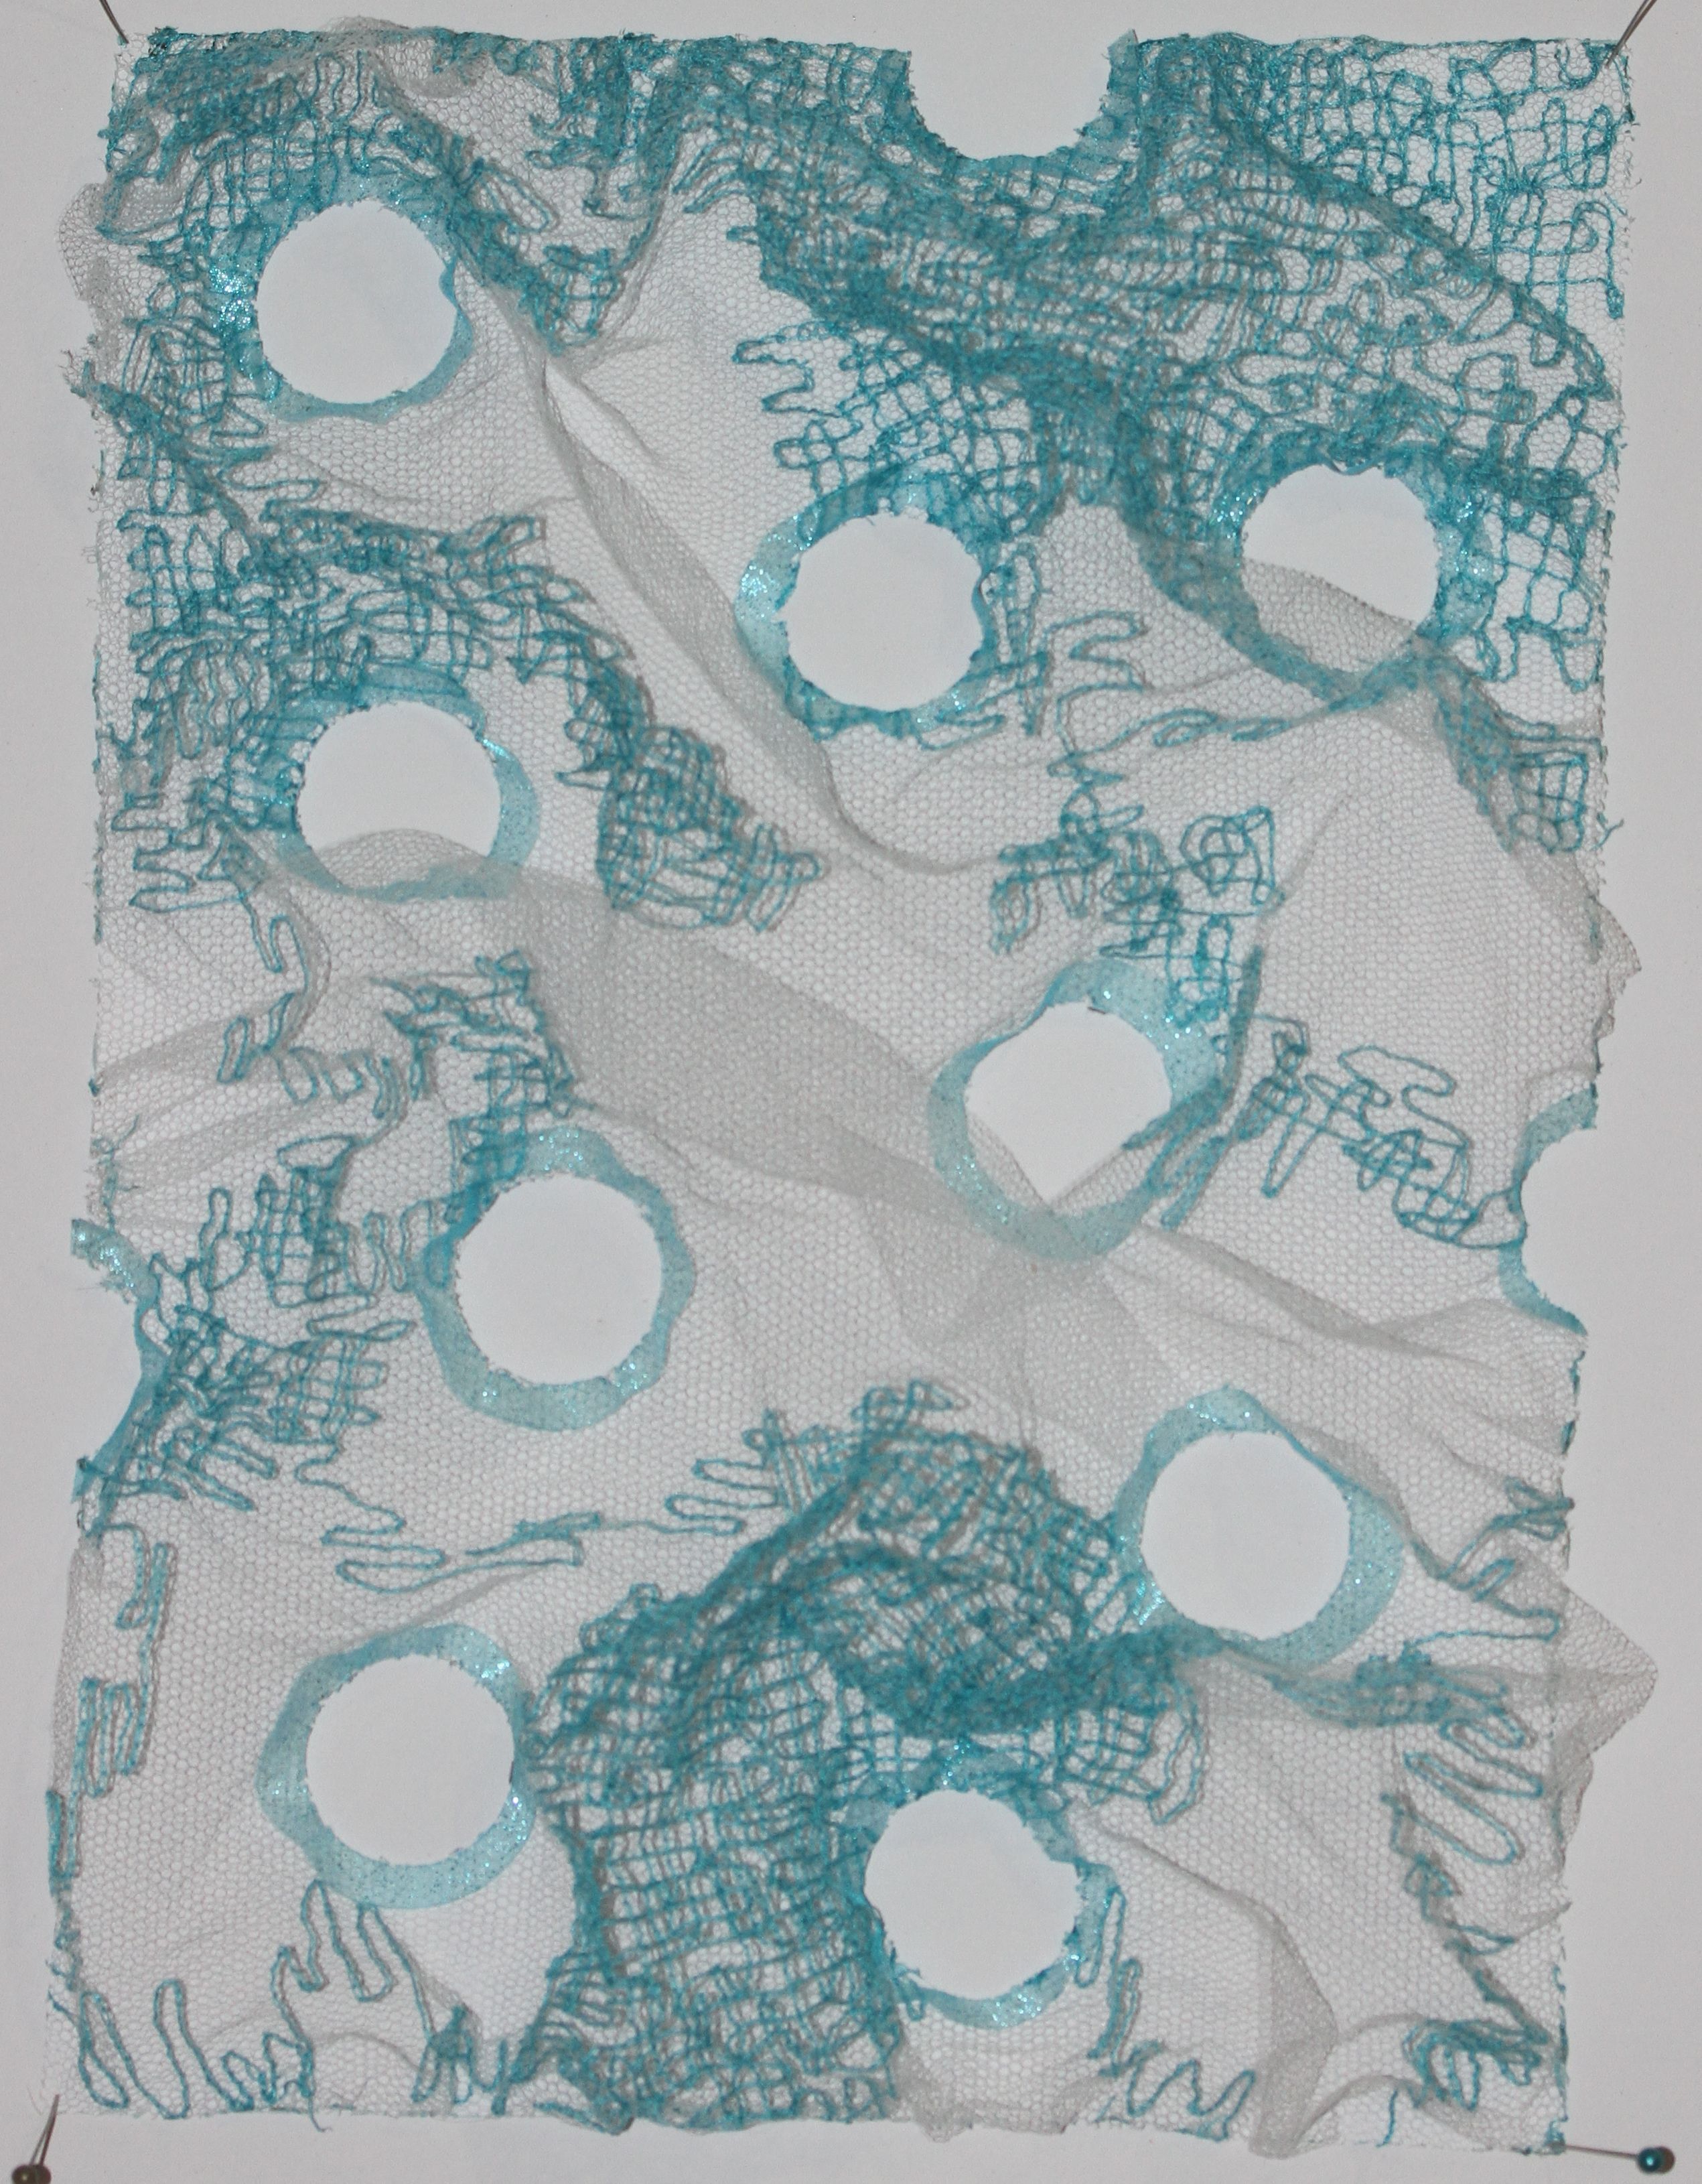
Piece #1 (version 1)
Reflecting. Piece#1 took a long time to develop, as I needed to explore each idea as it bubbled up, experiment with the soldering iron (which would lay the groundwork for the next two pieces), and solve several dilemmas, such as hand-stitching versus machine stitching, the technical issues of machine stitching on tulle, and adding spots of teal organza to the piece where the holes were made.
I am extremely pleased with the outcome! It fulfilled my intention of being inspired by my plastic stitched sample, while meeting my remit to maintain a sense of transparency, even fragility, and floating thread work. The three dimensionality of the piece was superior to what I expected to achieve.
An additional colour was added to the series in Piece #2 (see below). To connect the pieces, this was carried into Piece #1, and I think better for it! Here is the final Piece #1:

Piece #1 FINAL
Piece #2
In Piece #2, I set out to explore scale and repetition, while continuing with my remit of transparency and ‘floating’ stitch.
Base Textile
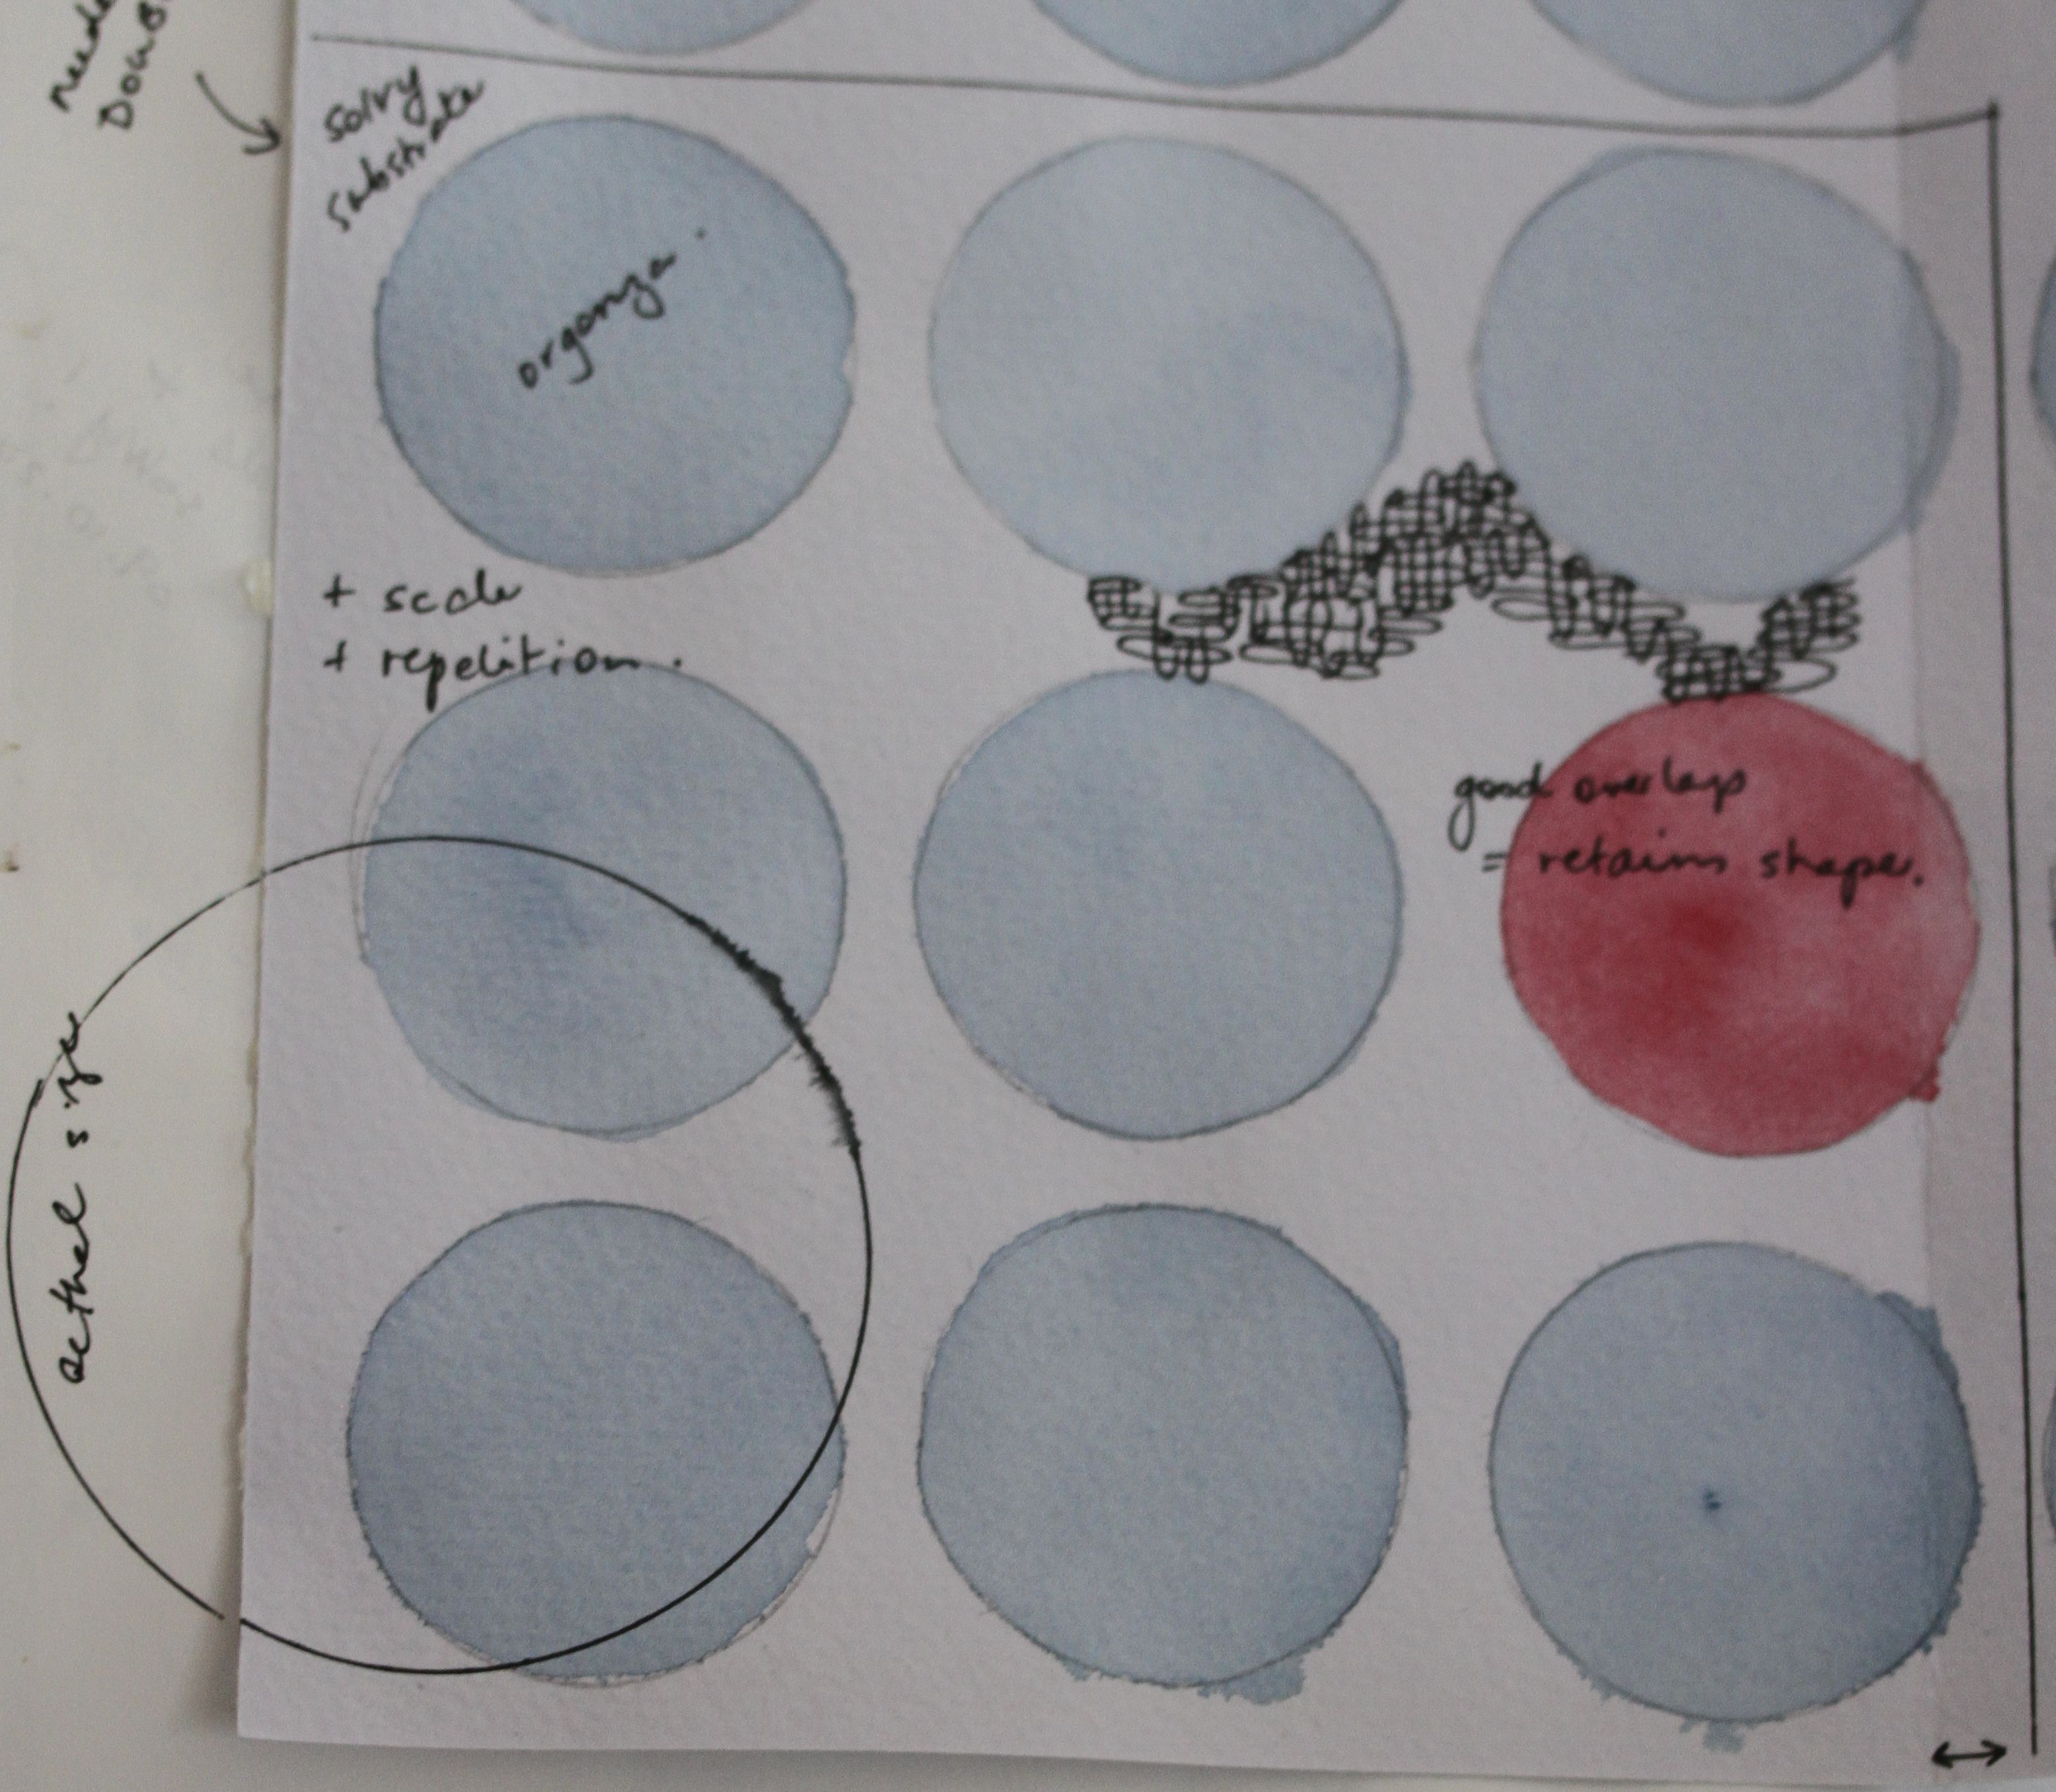
I began the development of Piece #2 with a brainstorming list and a series of thumbnail sketches investigating various scales of circles in repeating designs. I then selected several of my best ideas to integrate into Piece #2 (see sketchbook page).
The base textile this time would be a series of teal organza circles (7.5cm diameter), cut from a wide wired ribbon and other scraps, set in a a 3 x 3 grid, creating an approximately 27cm square. My layout/design:
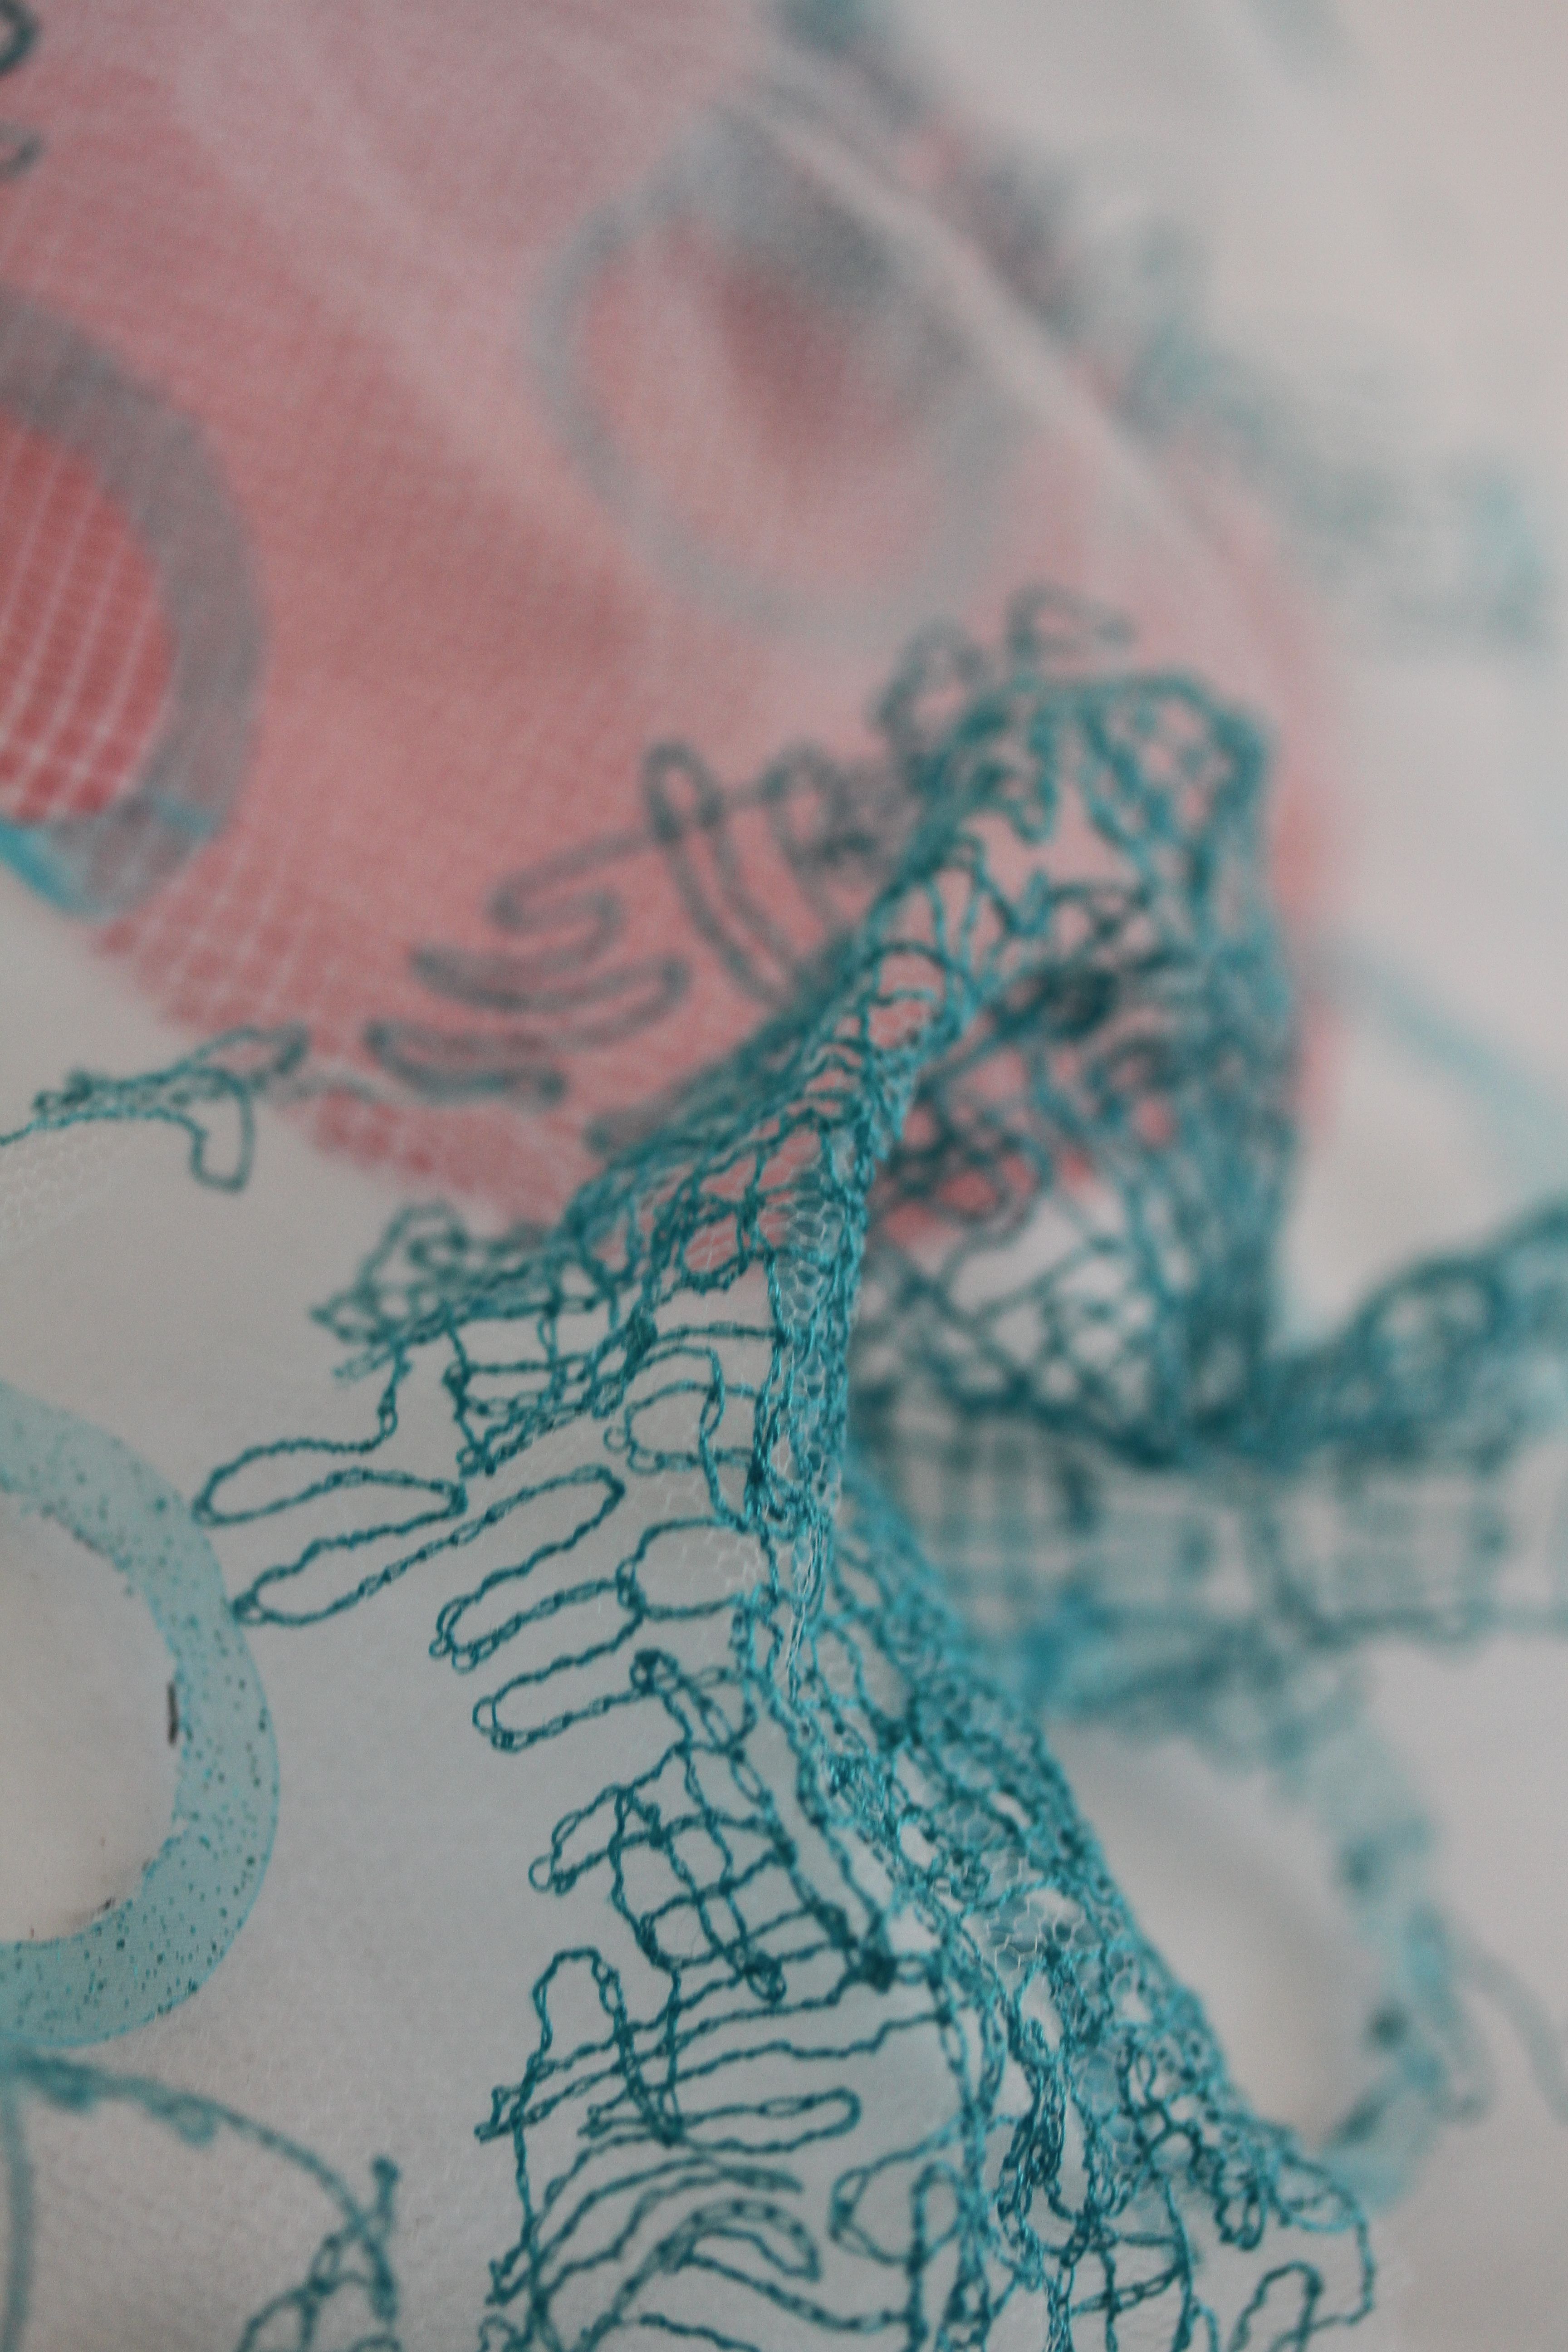
I added a new colour to this piece. By chance, my teal organza was resting next to the red bottle cap used as a template for the circles in Piece #1. I liked the combination.
The circles were made of pieces of teal-coloured organza ribbon ‘seamed’ together with the soldering iron (Margaret Beal’s method), then cut using a carboard template. The red circle is cut from a piece of ‘orange bag’. I chose this to echo the pattern of the tulle, as I didn’t have any red tulle on hand.
Stitch
I wanted to emulate the stitching motif used on Piece #1, but use it to link the coloured circles, so that there was not cloth, not even tulle, between them. This would be transparent and ‘floating’ in the purest sense.
After making some small samples, it became apparent that I would require two pieces of ‘solvy’ to make a substrate that would feed through the sewing machine. The circles were pinned in place and machine stitching using my motif applied to the entire surface, going over it twice, crossing extensively to ensure stability, and just catching the circles.
Coming soon: some short videos showing me working. Cutting the organza, stitching the background, and dissolving the “solvy”.
Final Product
All that remained, was to make cut-outs in the final piece. I placed paper circles over the piece until I was happy with the arrangement, and cut around these with the soldering iron.

Despite my careful arrangement of the cut-outs, there was something disturbing about the piece. I hung it up so I could look at it day after day. I wasn’t happy with the cut-out placement! The cut-out at the bottom edge of the piece led the eye off the piece into nothing.
My solution: I inserted another red piece, and moved the cut-out into the body of the piece. The composition was significantly better, looking more finished, and the additional red splash added balance to the piece. The new piece was inserted by placing a ½” piece of tulle behind the body of the piece and the new circle, then stitching with clear nylon thread to make the join invisible.
The background is very densely blue, and I asked myself in my notes whether I needed to add elements to lighten it. I decided to add some tulle elements around each cut-out.
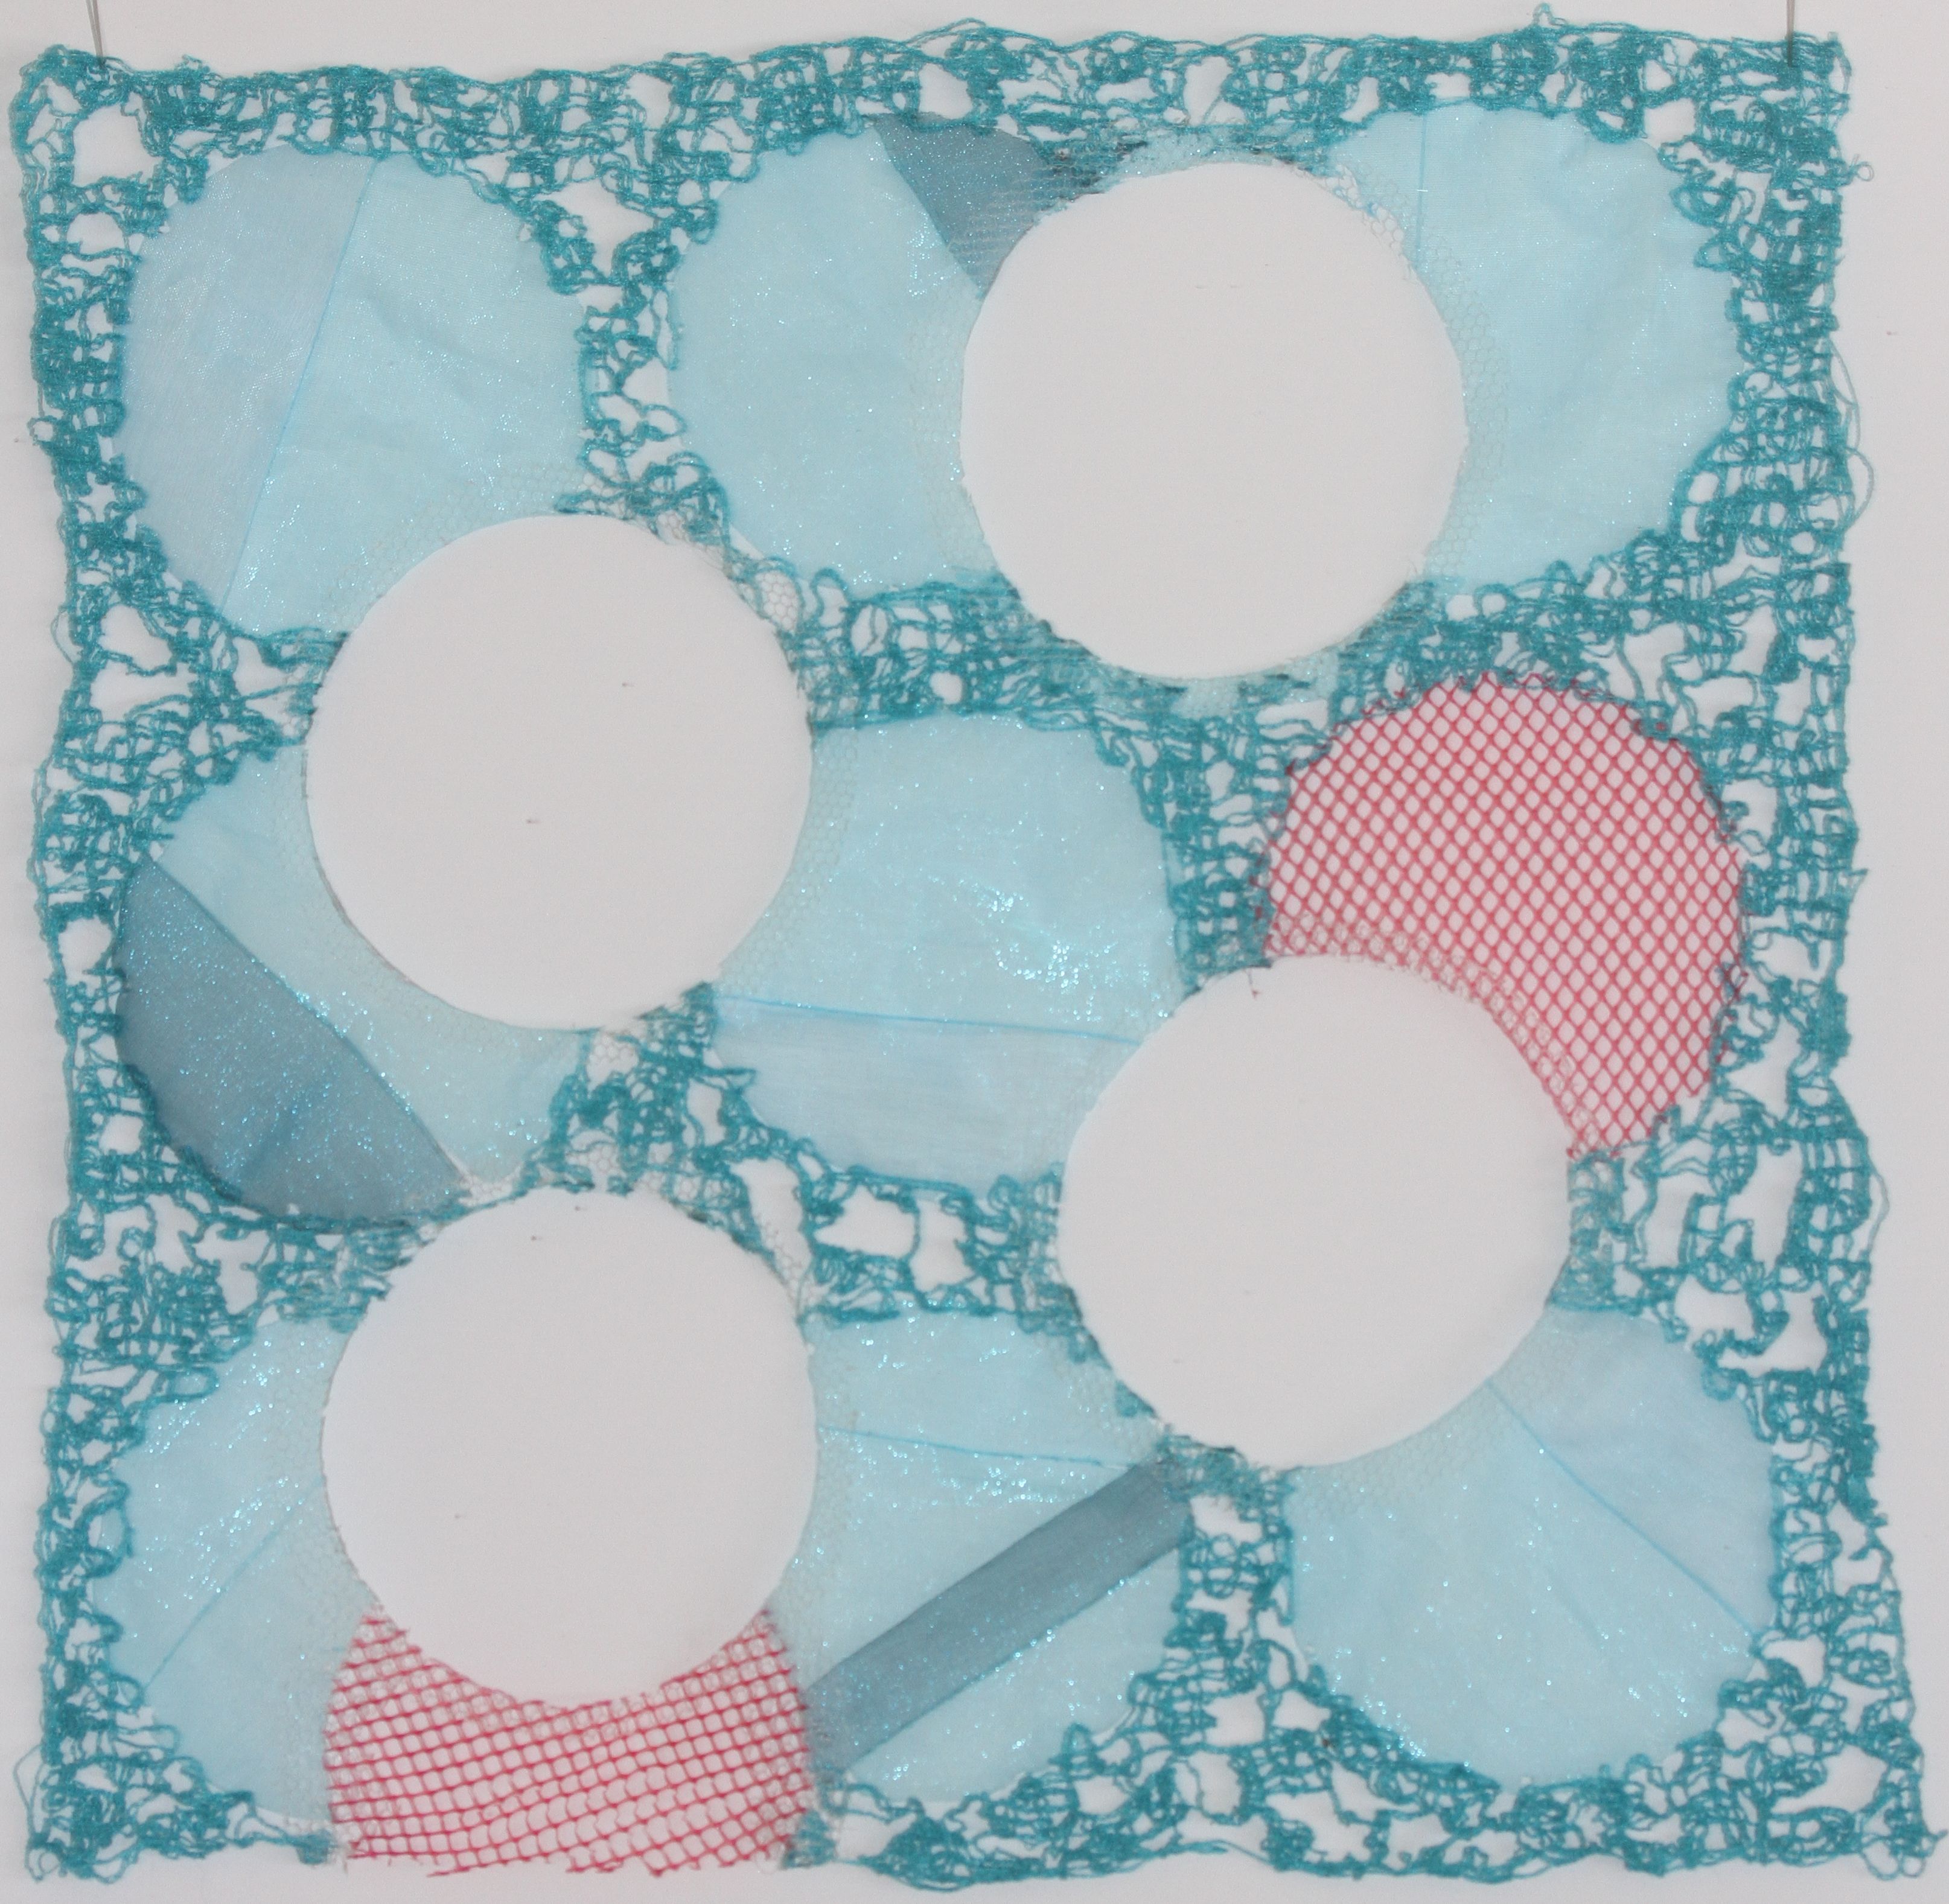
Piece #2 FINAL
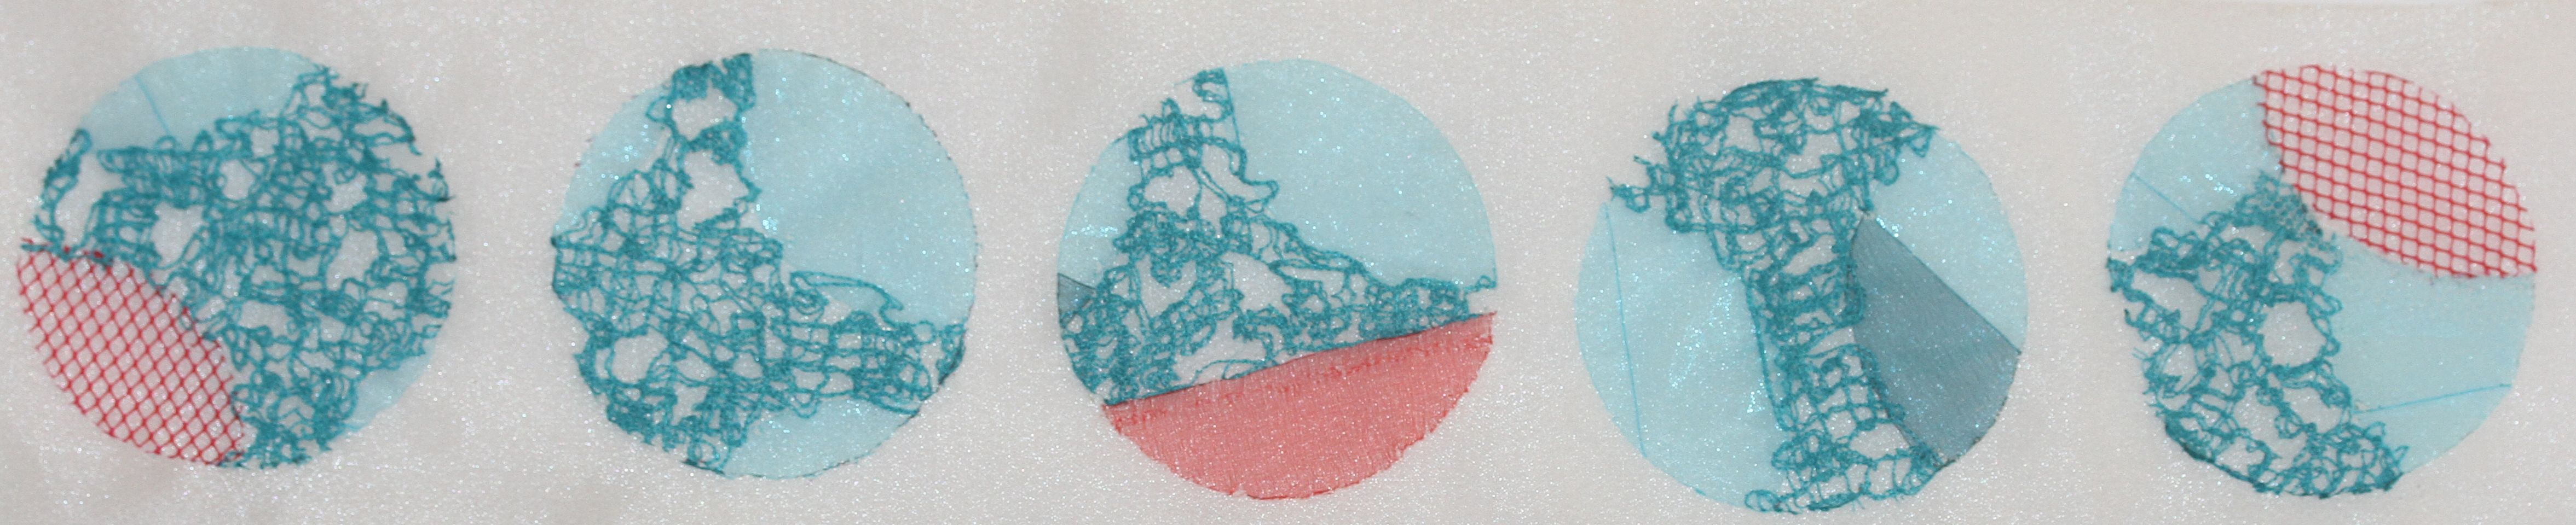
I couldn’t resist stitching the cut-outs onto a white organza background, as they were beautiful in their own right:
Piece #3
I took a step back before beginning Piece #3, to identify the elements I wished to include, along with transparency and ‘floating’ stitching:
- a placement design*;
- lightness (tulle);
- more variation of scale;
- a non-grid layout.
I also planned to incorporate materials and elements from the previous pieces to link the series together stylistically.
Placement Design
1. Focal Point
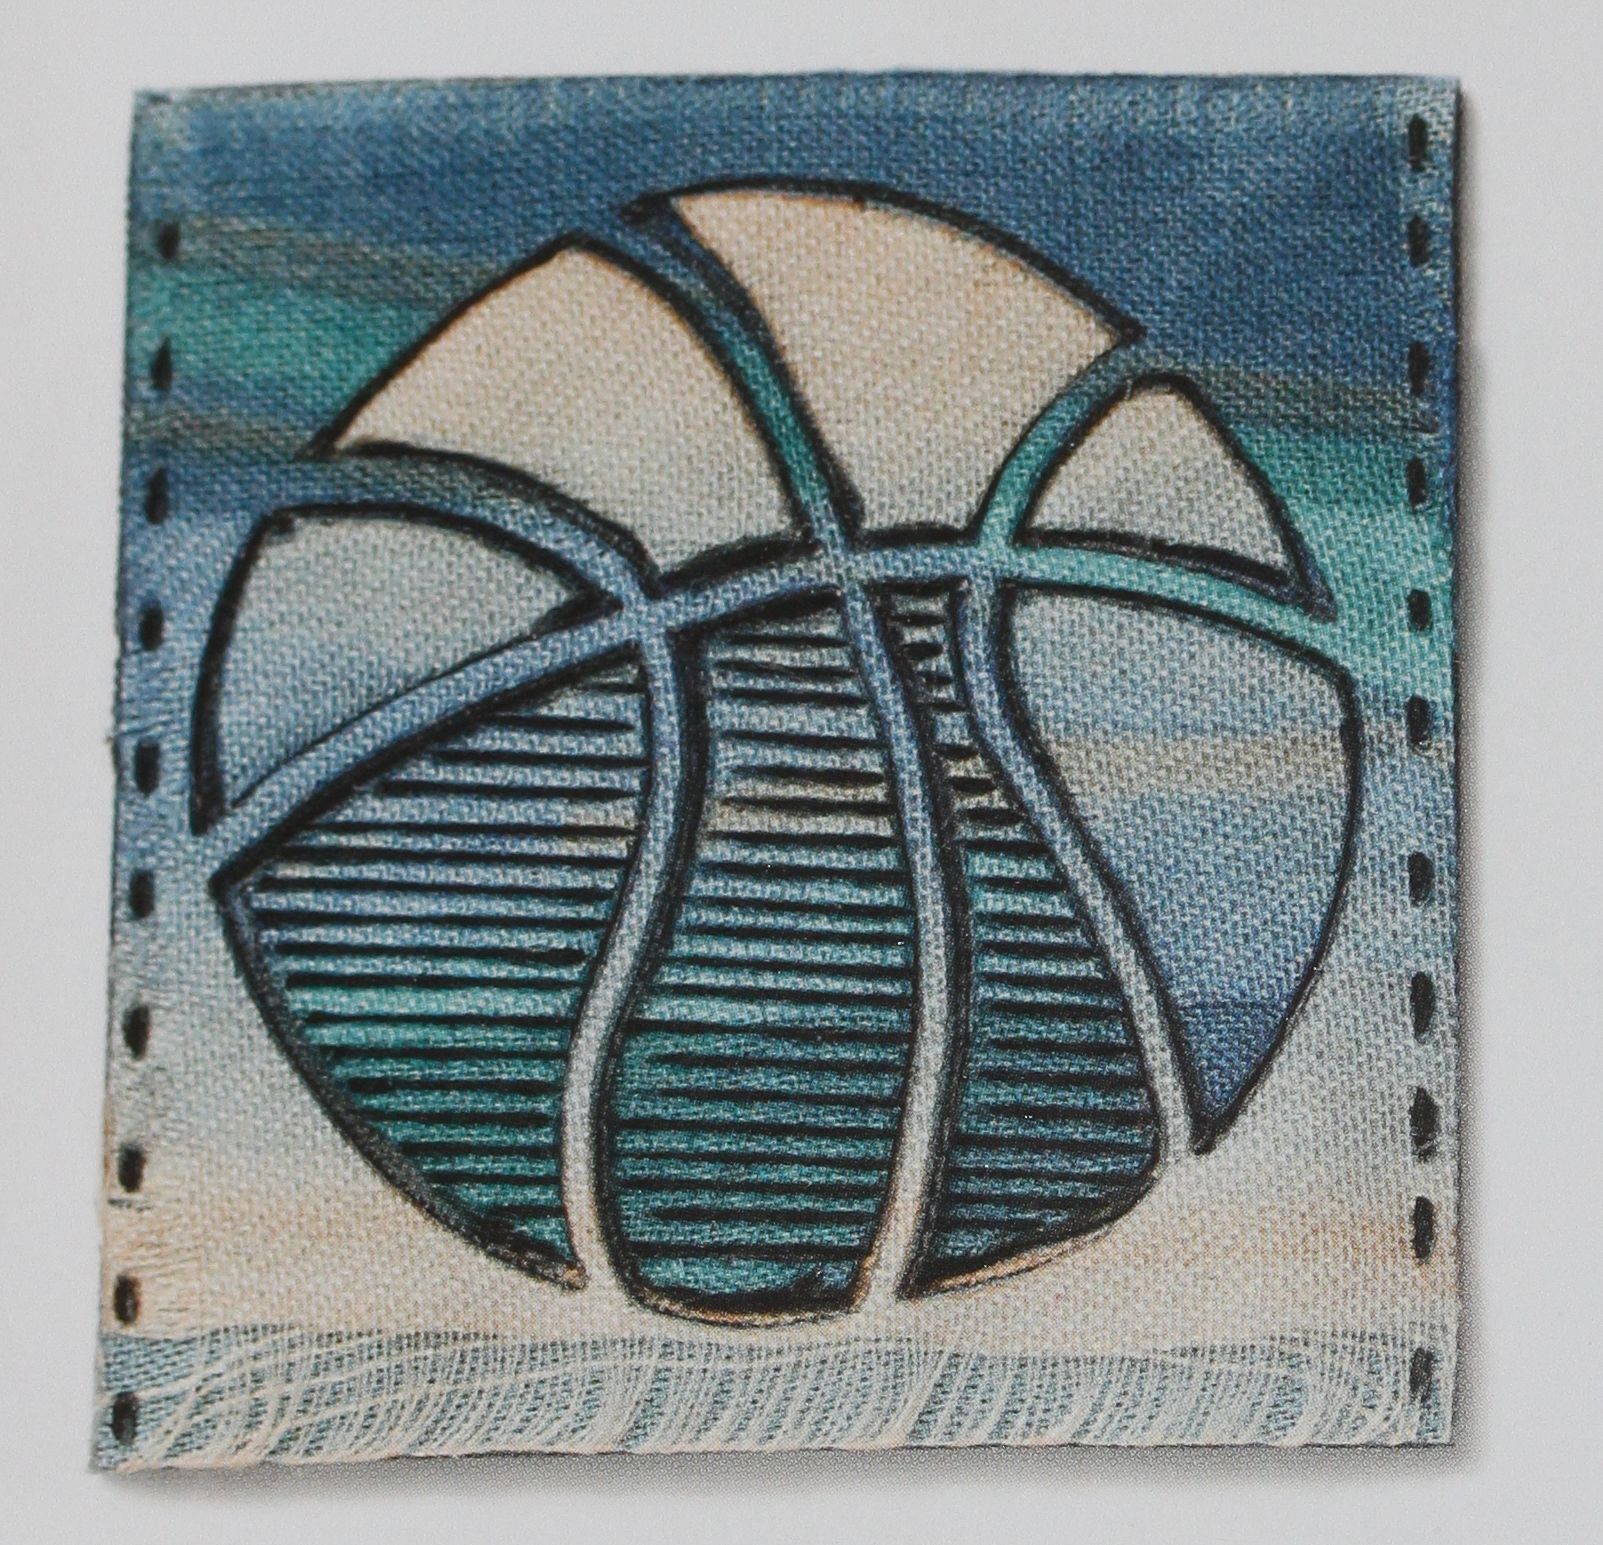
I returned to the soldering iron experiments from Piece #1 and my attempts to render the stitch motif as a design. I had a ‘lightbulb moment’ when reading Margaret Beal’s work when I saw this picture:
Beal (2013), p. 28.
I realised that I could ‘cut around’ the stitch motif, rather than reproduce the crossing of lines. Obvious in retrospect. I worked up the design, so that it could be cut with a soldering iron from organza:
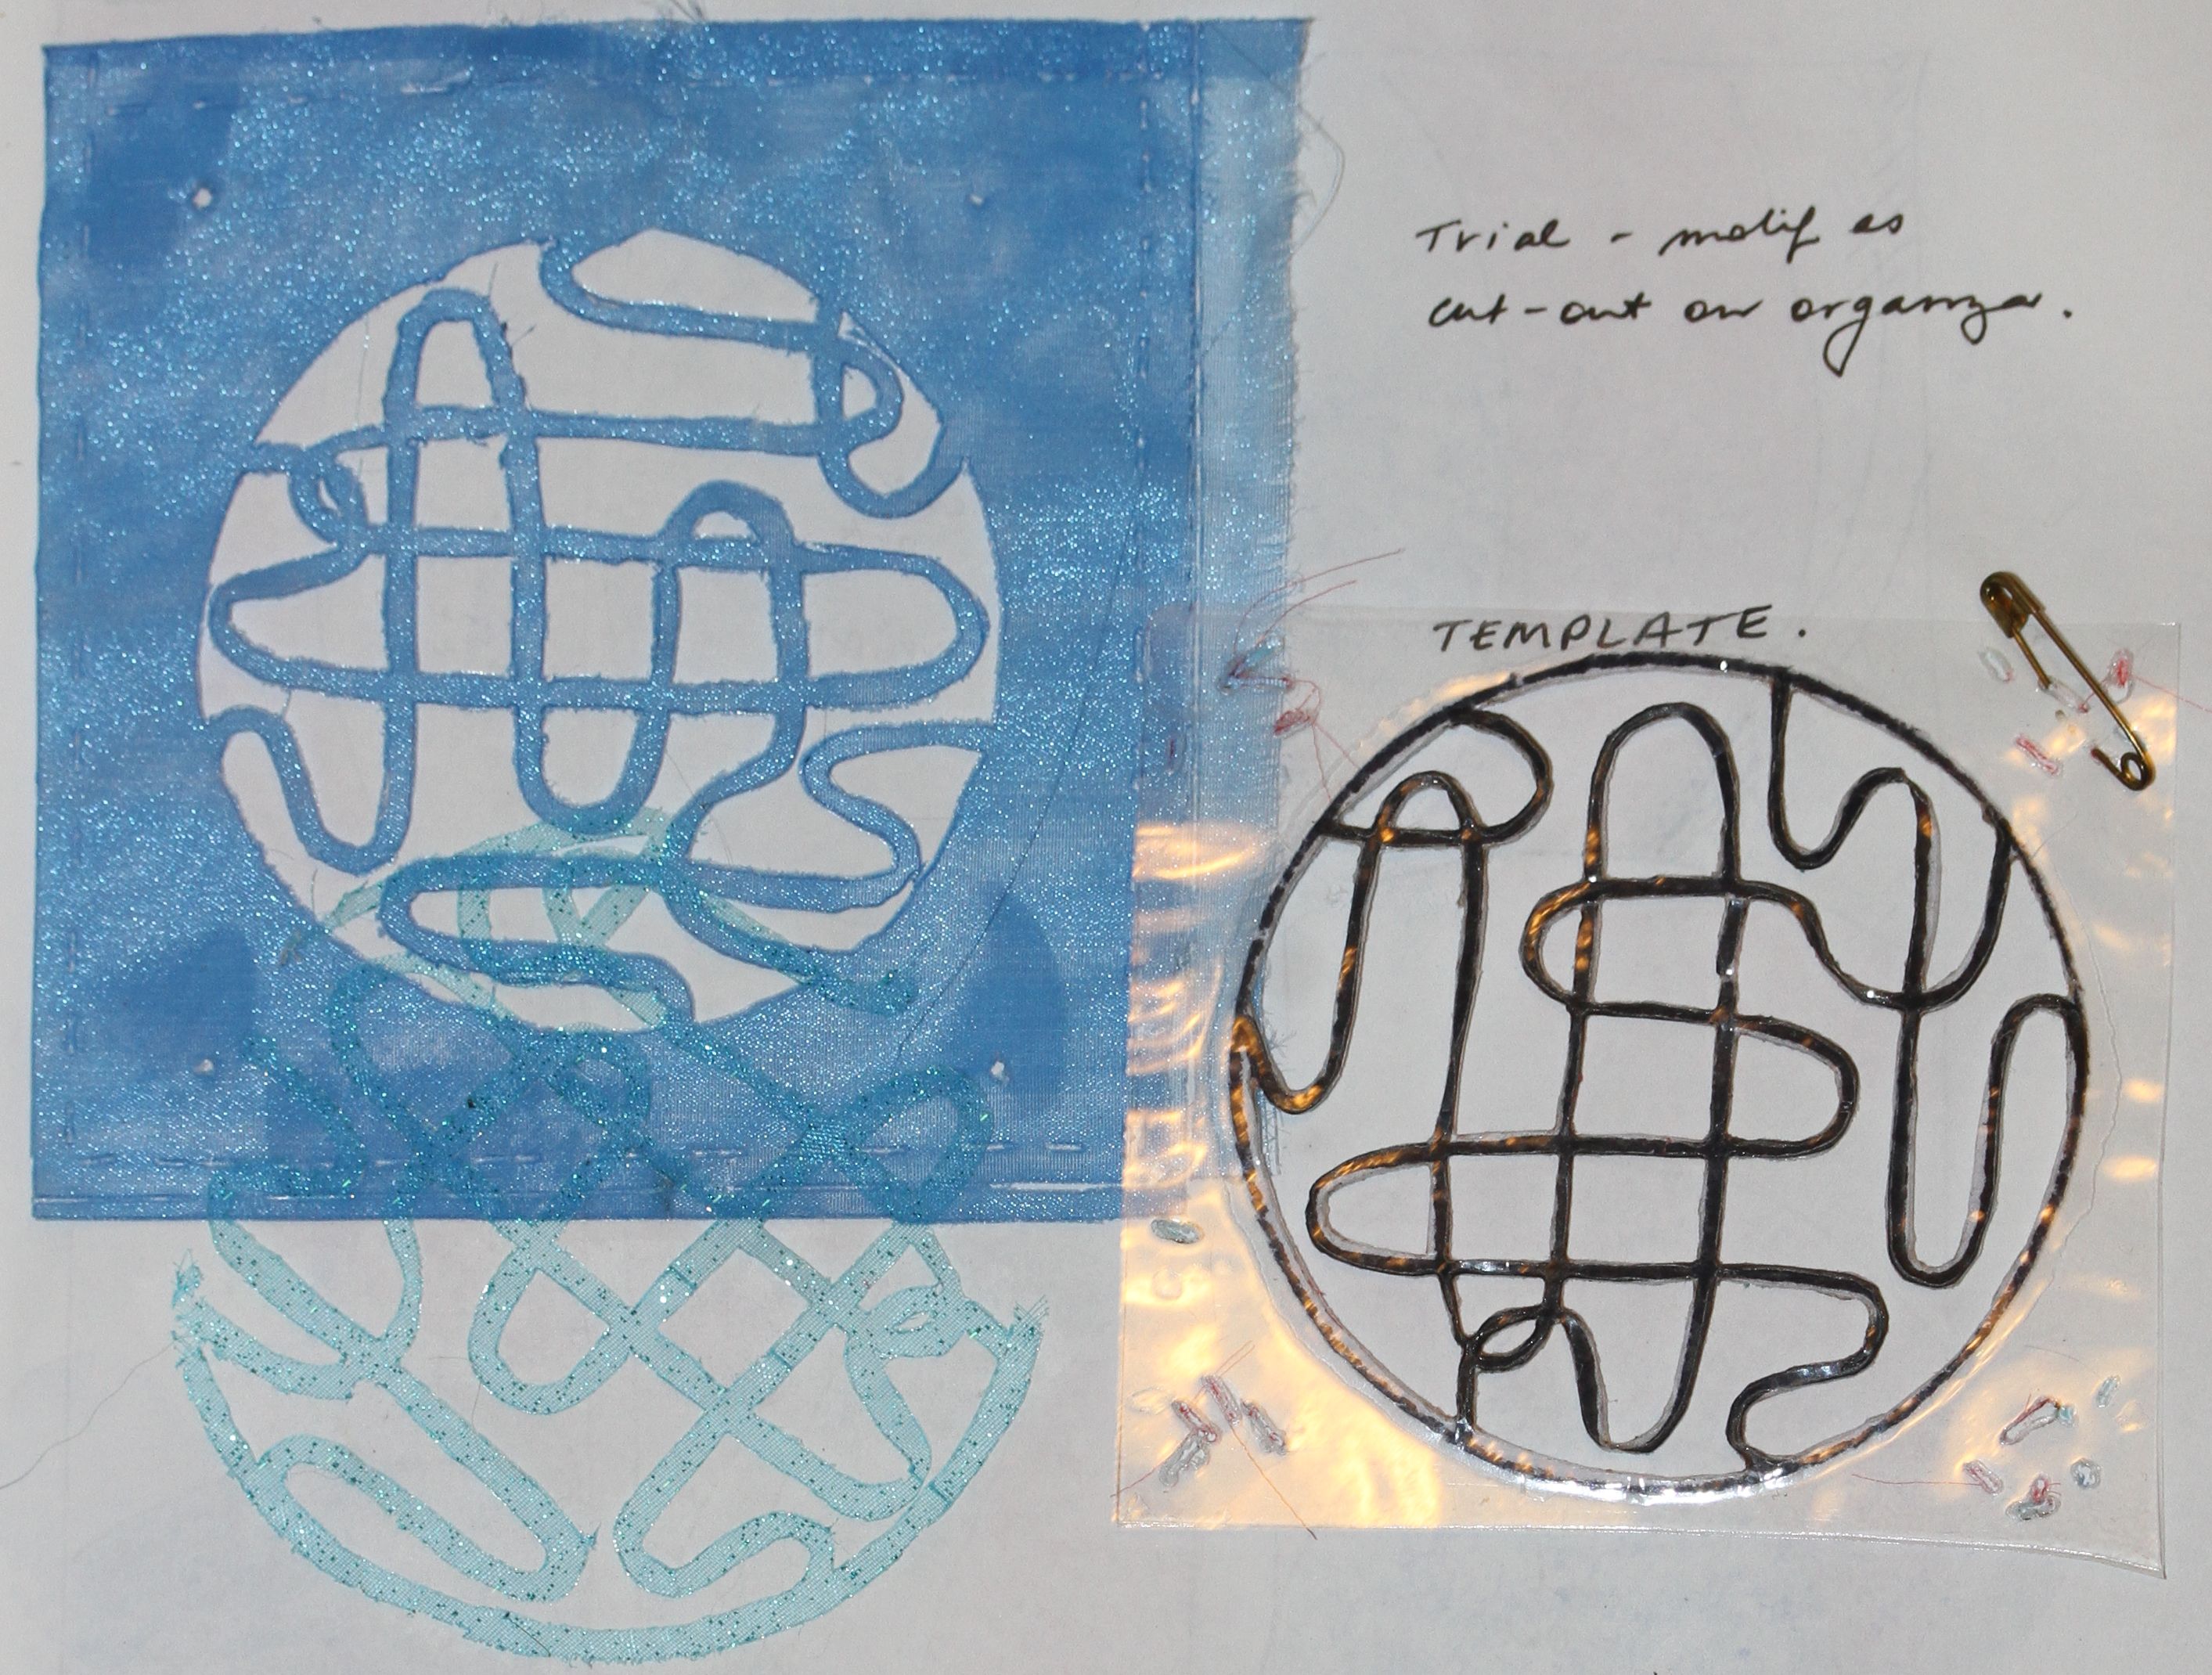
Sketchbook Page, showing trials and template.
This abstraction of the stitch motif would be the focus of the design.
To make the template: I drew the design on paper, and when satisfied with it, inked it with a wide Sharpie, laminated it to give it a more definite edge on which to guide the soldering iron, and cut out the voids with a craft knife. Although the laminate melted, the paper didn’t melt or burn, so the template maintained its shape.
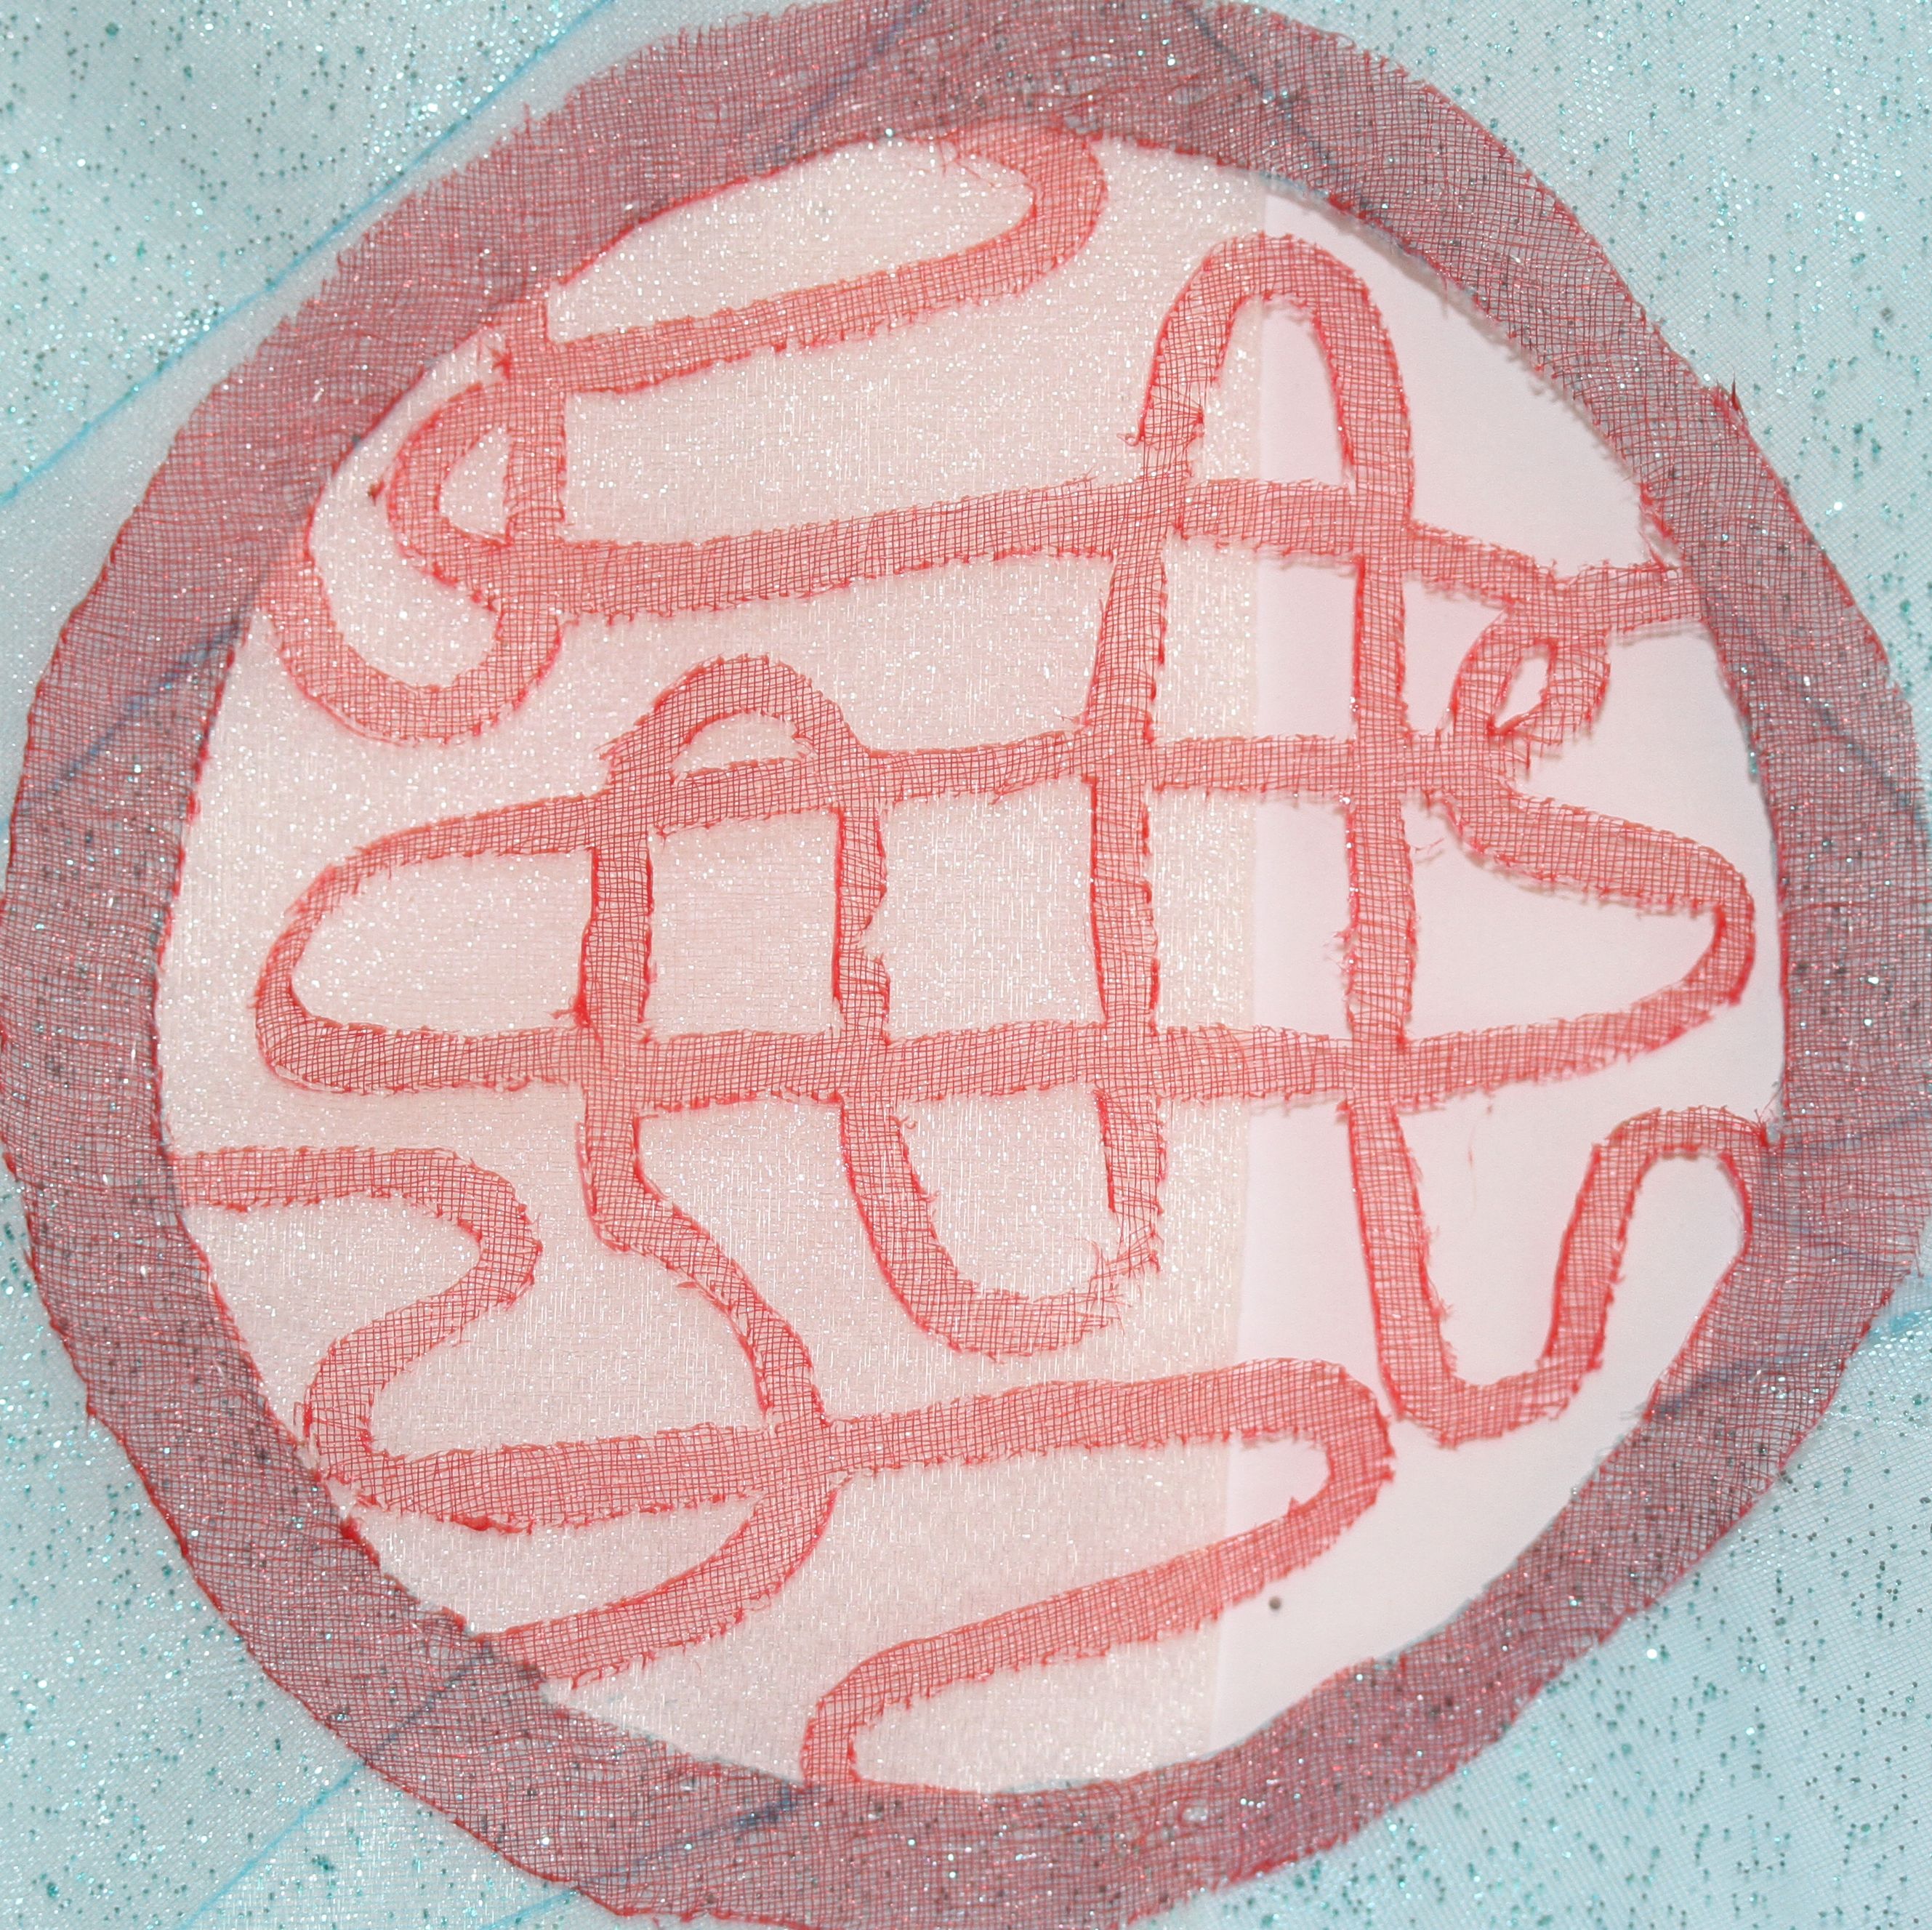
Motif cut from organza (click for a larger image)
Coming Soon: short video showing me cutting the motif design.
2. Concentric Circles
I wanted to break from the grid-like placements used in the other two pieces. Thumbnail sketches of various options, led to a final design sketch comprising concentric circles, filled with various elements used in the previous pieces:
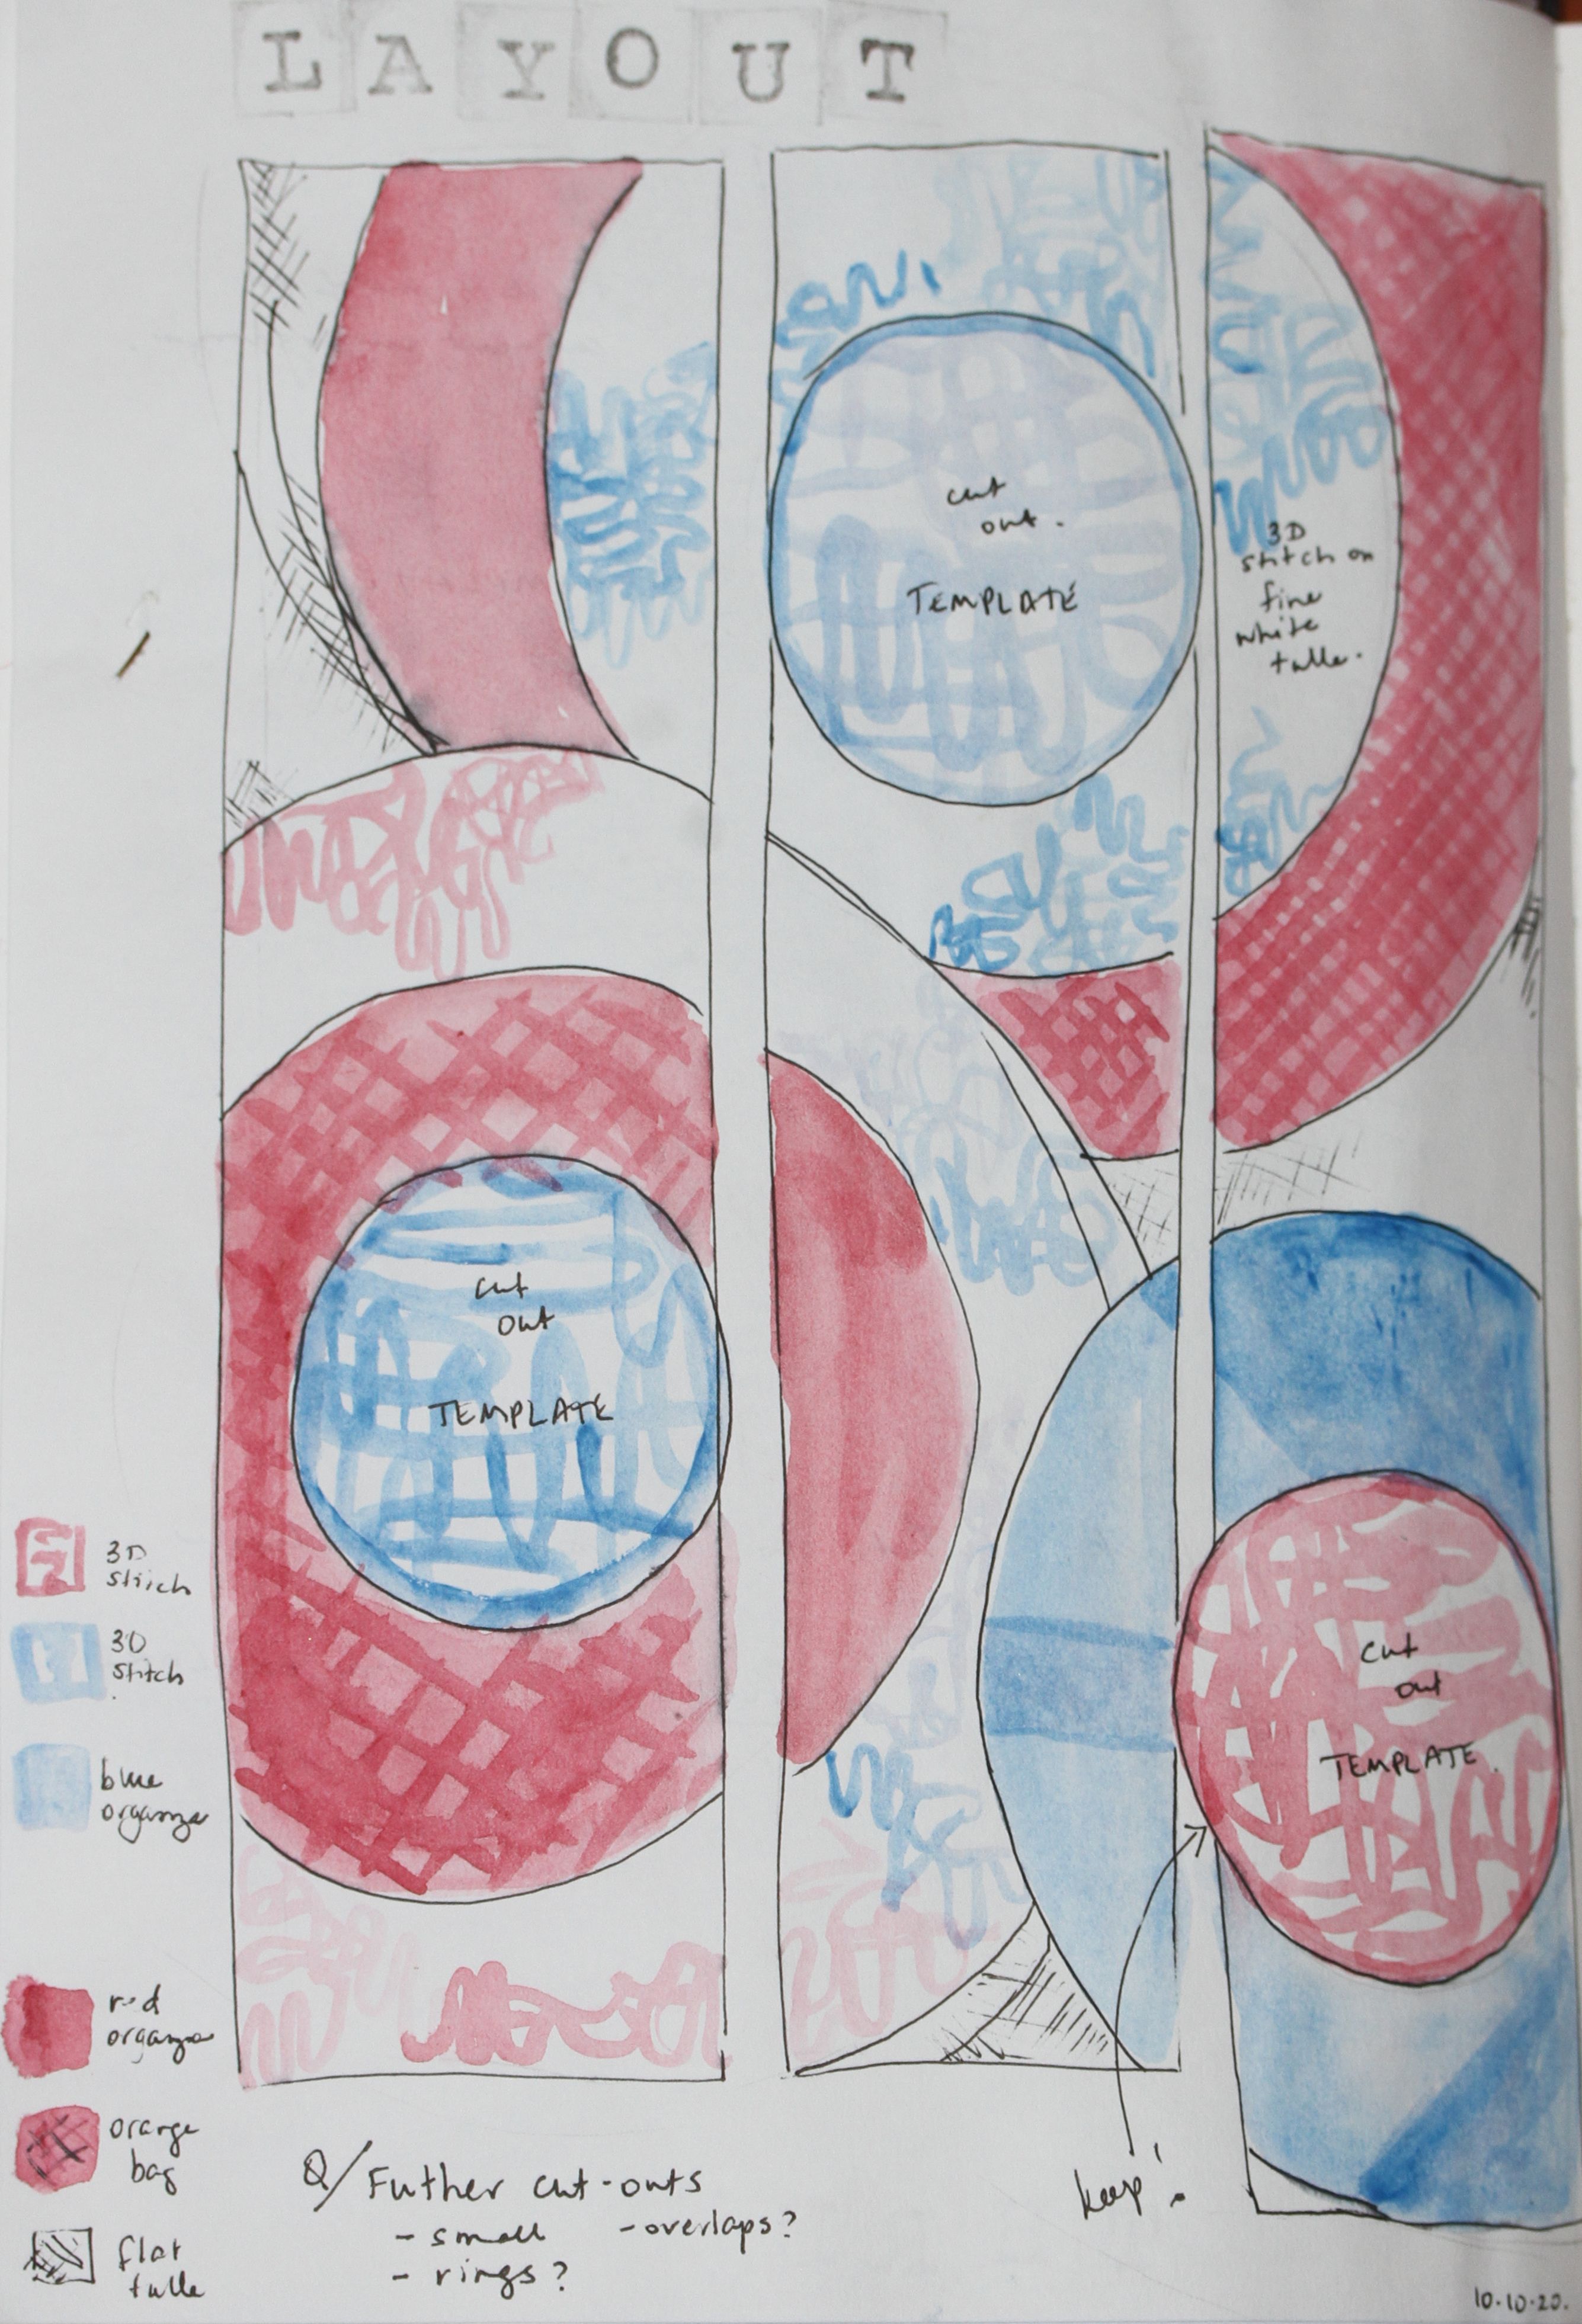
To make the template: I drafted a series of concentric circles using Adobe Illustrator and laminated the print-out to make a template similar to the one for the focal point design.
|
Design Key |
Fabrication |
|---|---|
|
Solid blue |
Blue organza ‘pieced’ together from wide wired ribbon and other scraps; cut using relevant concentric circle template with the soldering iron. |
|
Solid red |
Red organza scrap; cut using relevant concentric circle template with the soldering iron. |
|
Hatched red |
Red ‘orange bag’; cut using relevant concentric circle template with the soldering iron. |
|
Motif Design |
Blue organza ‘pieced’ together from wide wired ribbon and other scraps; red organza; cut using relevant concentric circle template with the soldering iron. |
|
White with squiggles |
Made as per the embroidered tulle piece for Piece #1: piece of fine tulle cut larger than required and reinforced with ‘Solvy’, machine quilted with stitch motif, gathered onto a piece of stiff white tulle cut using relevant concentric circle template with the soldering iron. |
|
Background |
Tulle |
3. Slices
This design incorporated vertical ‘slices’ through the piece. As I assembled the pieces, I became aware of the horrendous difficulty of lining up the sections given that the soldering iron shrinks as it cuts. I pondered over the slices, adjusting them for days. In the end, I decided to remake some of the sections and put it all back together! Unfortunately I didn’t take photographs to record this.
In the process of re-making, the following design changes were made:
- red organza section in the lower left circle replaced with a solid piece of ‘orange bag’;
- the focal point in the uppermost circle was re-made in red to provide more contrast between it and the adjacent circle.
2. Joining
I employed the technique used for adding the additional red circle in Piece #2. Behind each junction of a circle a ½” piece of tulle (cut with an approximately ¼” seam allowance using the relevant concentric circle template) was placed, then each section stitched by hand with clear nylon thread to make the join invisible.
Final Product
The final piece was invisible hand stitched to a rectangular background to give it strength, especially since the focal point cut organza was extremely fragile. The background comprised a piece of stiff white tulle sandwiched between layers of white organza then the edges cut and simultaneously fused with the soldering iron.
Finally, and edge of blue teal organza was added to the edge of the bottom left large white circle, to distinguish it from the background.
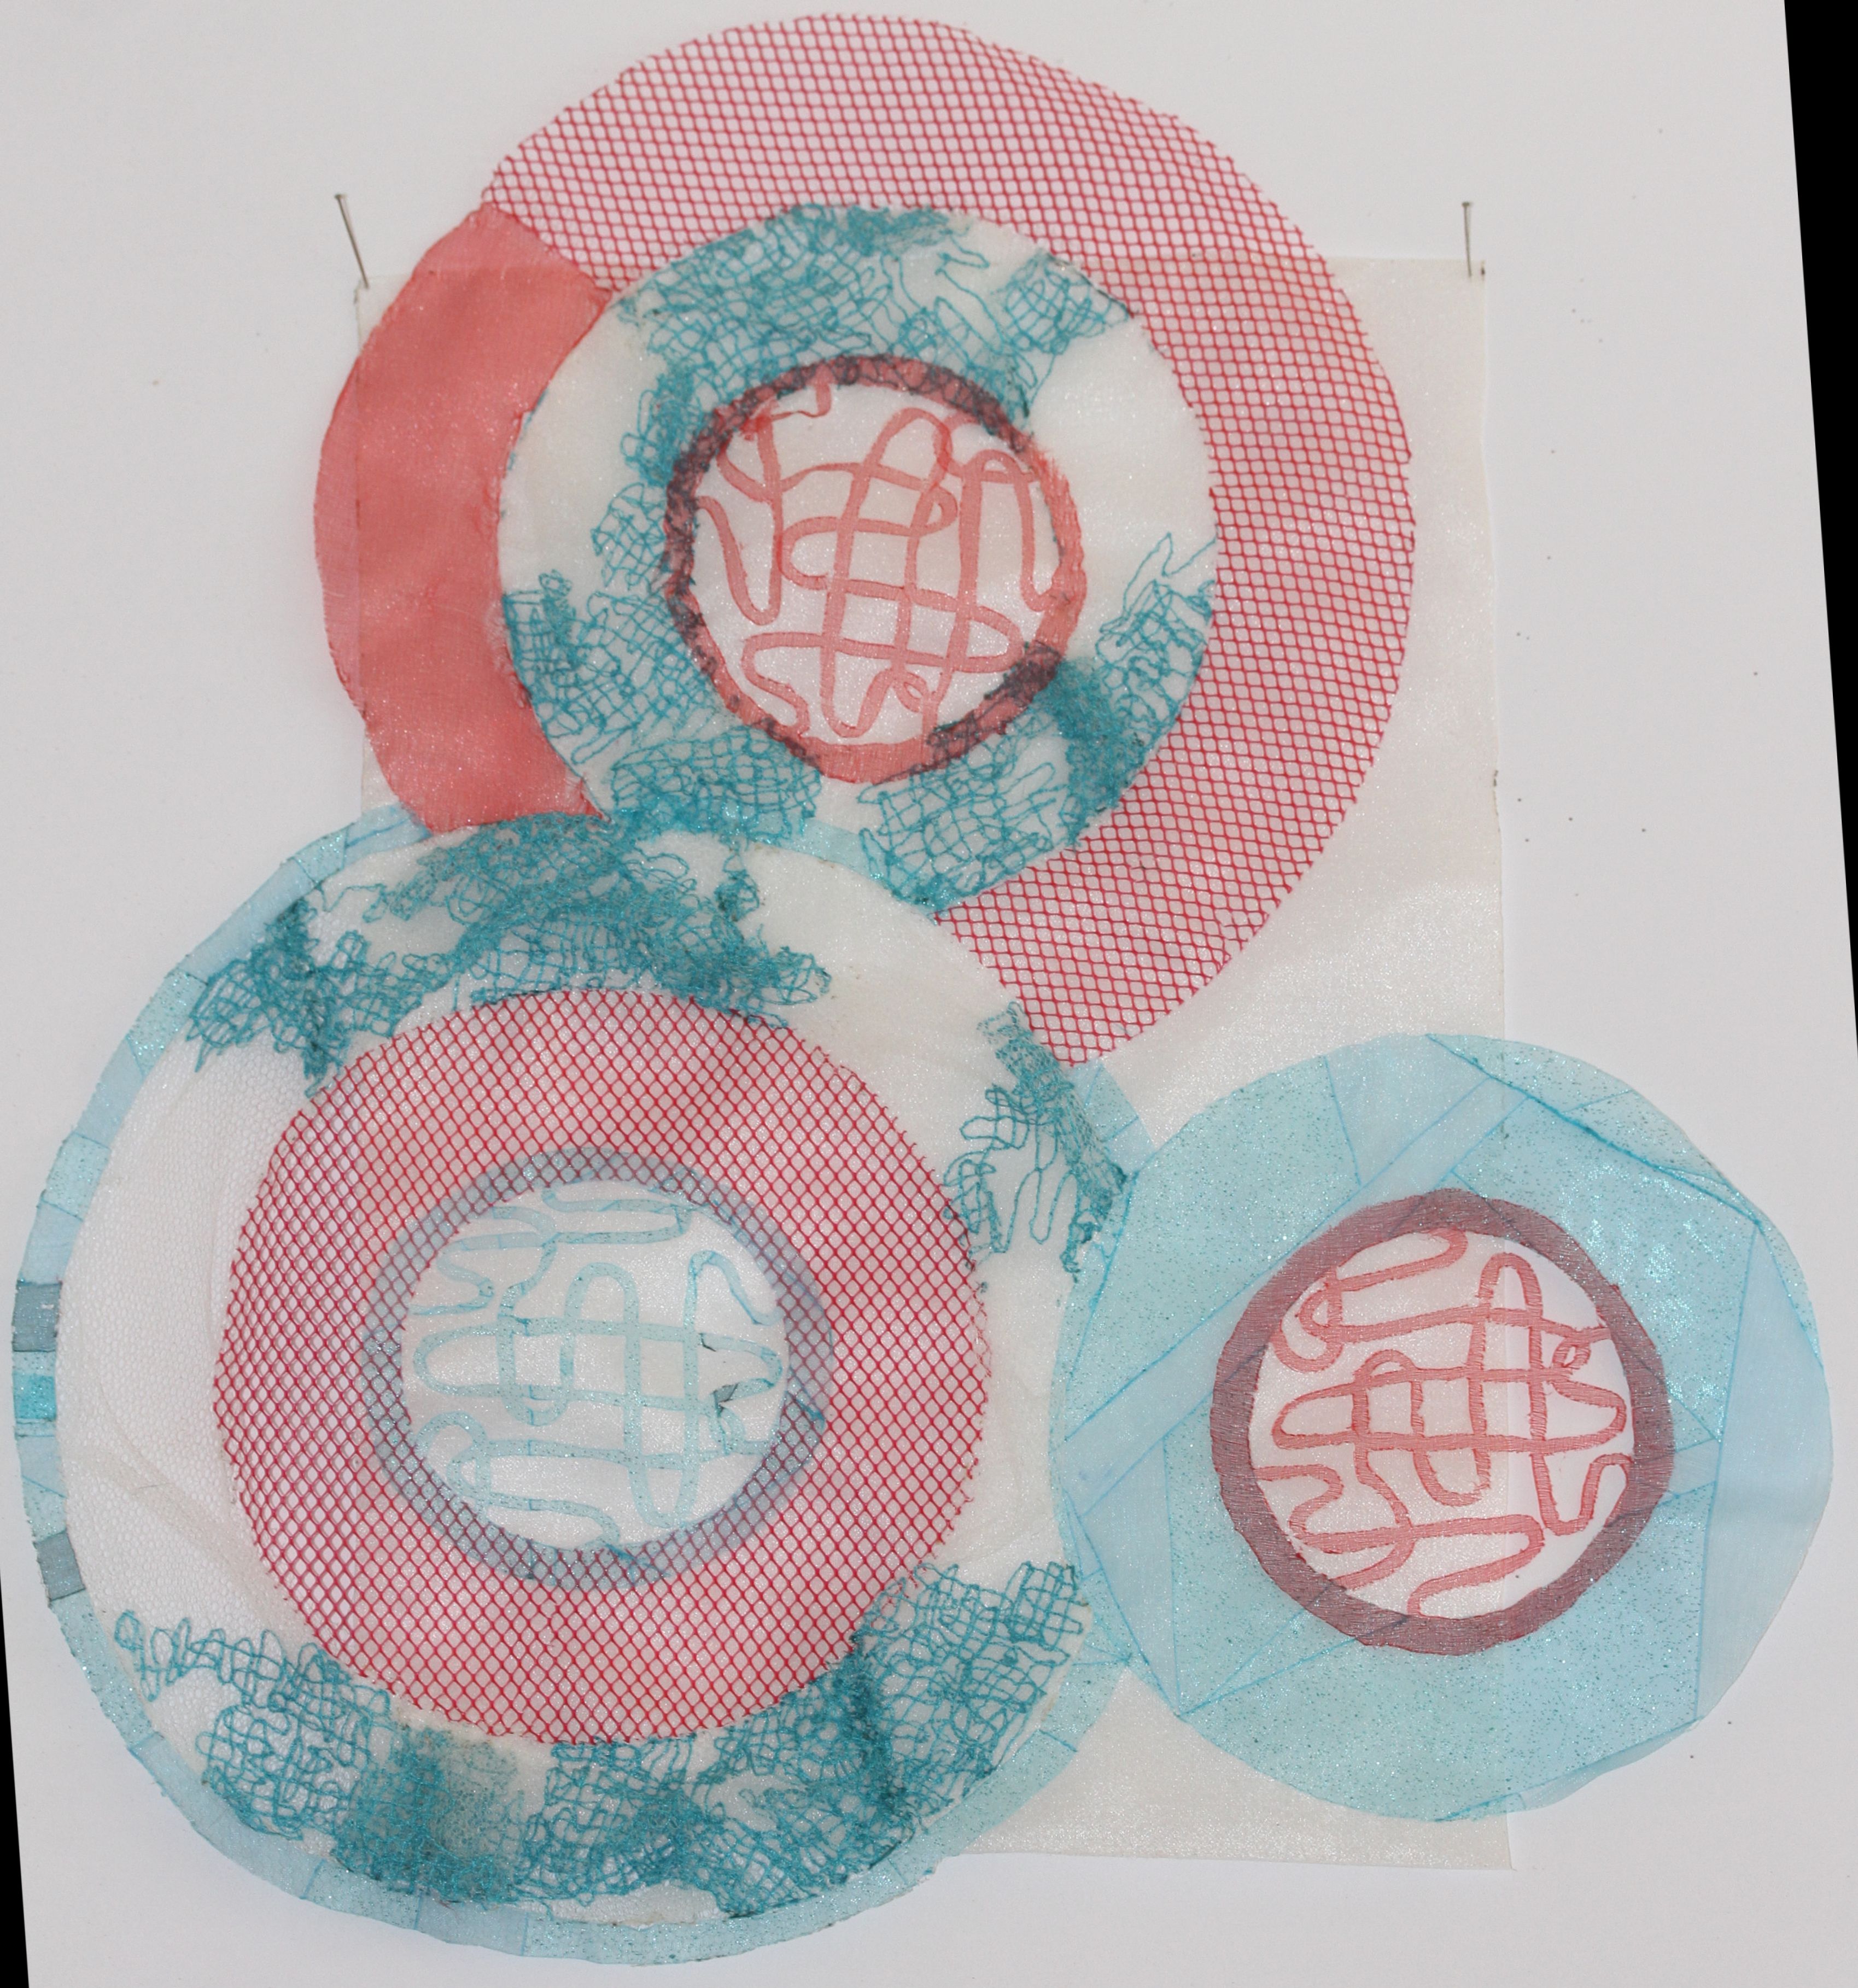


I am deeply unsatisfied with this piece. I have already spent weeks on it, so it will have to do for now; but, I consider it more of an interim design, than a truly finished piece.
I believe the fault lies entirely with the composition, rather than with the concept of using concentric circles, or the rendering. It points to a need for me to examine the subject of composition in more detail.
* Footnote
What is a placement design?
“controlled position of an artwork within a product” (Kerr, 2015).
References
Beal, M. (2013). Fusing Fabric: Creative cutting, bonding and mark-making with the soldering iron
Batsford (Pavilion Books Company): London
Kerr, C. (2015). ‘Placement Prints’ in nextstateprint.com/journal, March 16,
Viewed: https://nextstateprint.com/journal/learn/placement-prints/#:~:text=A%20placement%20or%20engineered%20print,the%20placement%20of%20a%20print, 20 October, 2020.
